
Photos by the author
This is the final leg of a long, complicated but enjoyable build. Firstly I must thank Joseph Spinalli for making this kit available to Saul. It is a great model and I hope that others will have a go. As you can see from the number of episodes, it has taken a lot of time, a few headaches and a great deal of pleasure.
Please don�t be put off by the complexity; as an old friend of mine once said, "don�t worry, it�s only paper and you can always buy another kit!" Having said that, as long as you take your time it should not be a problem. Remember, I�m always at the end of a phone line or email and I will be pleased to help with any problems.
Right, for the last time with Pardubice, sit back and enjoy the closing chapter.

Pic 1 Now that all the buildings and accessories are complete it�s now time to glue them together and add the �ground�.

Pic 2 This is my way of holding two parts together while the glue dries. The ruler holds the inside areas together.
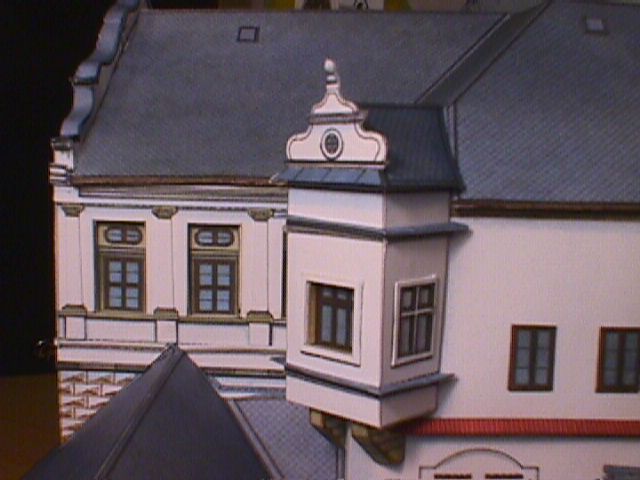
Pic 3 This part was one of the odds and ends I mentioned in the last review. The walls had to be glued together before this part could be added.

Pic 4 A close up of some of the small details that are added at the end. It�s quite a shame that with a model of this size the details can be overlooked.

Pic 5 Some of you may remember in the first part that I mentioned that some of the details would be added at the end to ensure that they were not damaged during the build. Here are a few of those pieces. The flag masts are made of wire with a �blob� of glue on the top and suitably painted.

Pic 6 The same pieces now in place on the towers

Pic 7 Here is the main entrance. It�s quite interesting to think that the building was one of the first to be made while the bridge was mentioned in the last review.

Pic 8 Another domed tower mentioned in an earlier section. The �grass� is added at the end and forms the base of the model. I glued the whole thing to a stiffer piece of card to make it easier to handle the completed castle.

Pic 9 A shot of the same tower from further away. At this point the building is almost too big for my work bench.

Pic 10 One part of the inner court yard. During the build, you may remember that I added small pieces of card along the lines of the courtyard floor. By adding these it made the job of laying the floor much easier.

Pic 11 This last appeared in the April review. As you can see this small court is almost swallowed up by the outer walls.

Pic 12 The castle has now been sitting on a shelf for some time and obviously the word has got round to my neighbours.

Pic 13 Our friendly helicopter road patrol sent me this !!
The last picture for this month. It�s the roof (if you hadn�t guessed already) with the two dormers. This was attached to the two walls and tower. A bit obvious I guess!
Finally it�s over. It now leaves me with a problem, what to make next? There can�t be too many kits that can match up to this one for size and number of parts. Does anyone have any ideas?
Thanks again to Joseph Spinalli, Richard Vyskovsky and Ercotyp for helping to make the last few months so enjoyable.
Summary:
|
Model: |
Pardubice Castle |
|
Kit: |
Erkotyp |
|
Designer/s: |
Richard Vyskovsky |
|
Availability: |
Erkotyp Website: http://www.erkotyp.cz |
|
Scale: |
1:165? |
|
Difficulty: |
2/3 |
|
Number of Parts: |
~ 1200+ |
|
Instructions: |
Czech and German Instructions |
|
Diagrams: |
Schematic diagrams |
|
Fit: |
Very Good |
|
Coloring and Artwork: |
Very Good |
|
Printing: |
Very Good |
|
Resources: |
|
|
Contact/Question |
Mike Stamper, via editor at nipngnwm@q-net.net.au |
