First Looks For the Month of January 2004
| Sd. Kfz.251/1 | Published by GPM |
| Designer: | Grzegorz Pomorski |
| Description: | German WWII Half Track Personnel Carrier |

Kit: Another of GPM's 1/25 Vehicles that comes in a A4 booklet. The booklet contains 10 pages, eight of the pages are card stock that contain the parts to build the vehicle. There are two sheets of diagrams printed on both sides that will be of great help to non-Polish readers. The inside front cover contains a history and the instructions for building the model, both are in Polish. The inside back cover contains a four view of the vehicle with exterior parts numbered. The back page contains some terrific photos of the completed models. The model contains a detailed engine, transmission, radiator and suspension. The cab and cargo compartment are completely detailed including the rifles the infantry carried in the cargo area.
Construction: Start your construction by cutting the large piece that consists of the outside of the cab and cargo compartment. Score, fold and glue this section. Cut out all the parts necessary to build the rims, hubs and tires and build your tires. Cut out all the bogies and parts to make the tracks, glue together and then build the suspension. Once the suspension is done then glue the tires, bogies and tracks to the bottom of the cab and cargo compartment. Build the benches and seats for the interior, add the instrument panel and steering wheel. Cut out the machine guns and rifles and glue to the top and interior of the model. Cut out and build the accessories, shovel, pick etc, and glue to their proper place on the vehicle. Cut out the supports for the canvas covering over the cargo area and glue them into positions. If you desire you can now make the cover from paper or a piece of cloth and glue over the supports.
First Impressions: A very nice looking and detailed model which is up to GPM's standards. These standards have set the example for the card modeling industry. This is not a model for a beginner but it is one you will be proud to display once finished.
| Sturmgeschutz IV (Sd.Kfz. 163) | Published by GPM |
| Designer: | Waldemar Rychard |
| Description: | German WWII Tank Hunter |

Kit: When Modelik broke off from ModelCard, we did not see much in new models from them for quite awhile. Now Modelik is hitting its stride and here is another of the many new models they have released in the last few months. This is a 1/25 scale model of a German Tank Killer produced in WWII. The model comes in a booklet that contains 20 pages of card stock and regular paper in A4 format. 12 of card stock contains the external parts to build the model. Five of the sheets contains paper parts as well as the internal formers for the model. The internal formers are to be glued to a heavy card stock to give the model its shape and strength. The other three pages of paper contains detailed diagrams to help you build the model. The inside cover contains a brief history, tech specs and instructions for building the model. All of these are in Polish so non-Polish readers will be dependent on the diagrams for help in building the model. There is no interior for this model.
Construction: First cut out all the paper parts that make up the internal frame. Glue all these parts to heavier card stock and when dry glue them together to make the internal structure of the vehicle. When the frame is completed cut the parts out to make the external covering for the frame and glue then over the frame. An engine is provided and can be built, if you decide to do this you can then make the hatches for the engine compartment so that they can be opened and display the engine. Cut out all the parts to make the bogies and tracks, glue together and then glue the completed components on to the bottom of the hull. Now cut out the parts for the main gun and machine guns and glue together. When finished glue the main gun into the front of the hull and the machine guns in their appropriate places. Build the extra track section as well as the other accessories and glue around the vehicle in the indicated positions.
First Impressions: A very nice looking model that
has a lot of external detail. If you are not concerned with internal detail
this will be a great model for you. Not an overly difficult model but one I
would not recommend for a beginner at there are many parts and detailed cutting
for that.
| P-6E Hawk | Published by Fiddlers Green |
| Designer: | Chauncy Green |
| Description: | 1930's USAAC Fighter |

Kit: This model is available in several different ways. You can order the model already printed or as an electronic download. It is also available on FG's CD with a multitude of other aircraft models. I obtained this model through electronic download directly from Fiddlers Green. It came in a PDF file that contains two sheets 8 1/2 by 11 inches. You will need Adobe Reader, a color printer and suitable card stock to print the model out. The scale of the model is 95% of WSAM. WSAM being the standard that FG uses and is 1/60th scale. One of the sheets contains all of the parts you need to build the model while the other contains a history of the aircraft and a diagram to show where all the parts go. All printing on both sheets is in English.
Construction: FG's models do not contain any internal formers so shaping is very important when assembling your model. Cut the pieces out to make the fuselage and shape them. Use the tabs that are on each section to glue to the next section. Cut the seat out and install in the cockpit and then cut and glue the windscreen to the front of the cockpit. Cut out the bottom wing, shape and glue to the bottom of the fuselage. Cut the wing struts out, I recommend that you use a flat toothpick or some wire to give the struts strength, and glue the struts to the fuselage and bottom wing. Cut and shape the top wing and glue to the top of the wing struts. Cut out the auxiliary fuel tank and headrest and glue to the fuselage. Cut and shape the tail section out and glue to the rear of the fuselage. Cut out the landing gear struts, wheels and spats, again I recommend wire or toothpick to give the landing gear strength, and shape these parts and then glue them together. Glue the completed landing gear to the bottom of the model. Finish your model off by building the oil cooler and propeller and gluing to the front of the model.
First Impressions: A very colorful little model with a minimum of parts so it will not be too difficult to build. The only problem is that it is a biplane and you must be very careful when making the struts and attaching the top wing. I highly recommend the toothpicks or wires to make it easier to handle the struts.
| Lavochkin La 5FN | Published by DeWayne Barnett |
| Designer: | Marek Pacynski |
| Description: | Russian WWII Fighter |

Kit: This 1/50 scale model is available by electronic download across the Internet. It is sent as a PDF file so you will need Adobe Reader and a color printer to print the model out. The model prints out to four sheets, the cover sheet, a sheet that contains a history and technical specifications of the aircraft. A sheet that contains the formers and landing gear along with a detailed diagram that shows the position of all parts. The final sheet contains all of the rest of the parts needed to build the model. All parts to be reinforced are marked with red. There is no cockpit nor are there wheel wheels as the canopy is colored card stock and the landing gear glues directly to the bottom of the wing.
Construction: Cut out all parts that are marked with red numbers and glue to a heavier card stock. These parts will be used internally to give your model strength and shape. The fuselage is built using the "butt and glue" method. Build each fuselage section with a former in each end and when completed glue all the sections together to complete the fuselage. When building the cowling notice that part 12a goes inside the cowling so that you have color where you can see inside. Cut out parts 9 and 9a and make the canopy, then glue to the top of the fuselage. Insert the formers for the tail section and wings through the fuselage. Cut out the skins for the wings and tail and glue them over the formers you just glued through the fuselage. Build the landing gear and glue to the black areas under the wings and rear of the fuselage. Cut out parts 26 through 28 and build the spinner, then cut and build the propeller and glue into the spinner.
First Impressions: This model is another of Marek's outstanding model in 1/50 scale. This is a model that we have not seen in this scale before and will be welcome in any collection. Not a difficult model to build but I do recommend that you have some card modeling experience before attempting the model.
| USN Ward & PBY-5A Catalina and IJN I-16 | Published by JSC |
| Designer: | Bartosz Czolczynski |
| Description: | USN Destroyer & Flying Boat and Japanese Sub |

Kit: This 1/400 scale kit is designed as a diorama of Pearl Harbor on December 07, 1941. It consists of two sheets that make up a water background, the Destroyer Ward that attacked one of the midget submarine trying to enter into Pear Harbor. The I 16 the submarine that carried the midget sub along with a midget sub to mount on the I 16. Finally a PBY-5a Catalina flying boat. All of this comes in a booklet that contains four pages of A4 paper and card stock. The inside cover, one side of two sheets contains the history of the ship and instructions all in Polish. The other side of the two sheets contains the simulated water to place your diorama on. Detailed diagrams are contained on the front and back sides of the rear cover. The PBY parts are contained on the back of the rear cover. Since they have used both sides of the rear page and the two paper sheets, you will want to copy at least the diagrams before starting.
Construction: Building the Destroyer and submarine are the same. They use the standard "egg crate" method that most card ship models use. First thing to do is to glue the base plate, formers and decks to a heavier card stock for strength. Now glue the formers onto the base plate and when done glue the deck to the top of the formers. Cut out the hull sides and glue between the base and deck. Build the superstructure for the destroyer and sail for the submarine and glue to the deck. Build the Guns for the destroyer and the midget submarine for the sub and glue to the appropriate place on each ships deck and superstructure. Finish the ships up by building the funnels and lifeboats for the destroyer and guns, scopes and antennas for the submarine. Cut out the frames for the PBY which are located on the same page as the sub and glue to a heavier card stock. Build the hull of the aircraft, wings and tail section and glue all these together to complete the model. When finished with all three models, glue the simulated water to a heavy card stock and you now can place your models on this to complete your diorama.
First Impressions: Quite a busy kit for the price. Will take steady hands to build all the small parts necessary to complete the model. Not for a beginner.
| PZL 130 TB "Orlik" | Published by Modelik |
| Designer: | Artur Pasierbinski |
| Description: | Polish Trainer |

Kit: A 1/33 scale model of a modern day Polish trainer that comes a booklet that contains four pages A4 in size. The external parts for the model are on two pages of card stock and there is a sheet that contains parts to be glued to a heavier card stock. These parts are to be used as internal supports and to make the propeller and instrument panels. A detailed cockpit and wheel wells are provided. A colored card stock canopy is provided which you can use if you decide not to detail the cockpit. The front inside cover contains a history and building instructions both in Polish. There is one page of detailed diagrams and the inside back cover contains a three view of the model with parts marked on the diagrams.
Construction: Before begining construction of the model cut all the parts out of the page printed on regular paper and glue them to a heavier card stock. The fuselage is constructed using the former connecting strip method. In this method you build each fuselage section with a connecting strip and former in one end and then use the connecting strip to glue the section to the next section. Make sure that you build the cockpit and glue into the appropriate fuselage section before attaching to the next section. Take the wing former that you reinforced and glue it through the fuselage. Now cut out the wing skins and glue these skins over the former, when finished do the same for the horizontal and vertical tail sections. Build the wheel wells and doors and the landing gear, when finished glue these parts to the bottom of the model. Build the propeller and exhaust and glue them to the forward part of the fuselage.
First Impressions: A model of an aircraft that we in the West have never seen before and will make an unusual addition to any collection. Not too many parts and those parts are big enough for even the beginner. This would be a good model for those moving up from the more simple models to those that use internal formers.
| Le Zebre | Published by Orlik |
| Designer: | Bartlomiej Kolek |
| Description: | 1907-1912 Automobile |

Kit: A 1/15 scale model of an early automobile that comes in booklet form. The booklet contains eight pages of A4 paper and card stock. There are four pages of regular paper and four pages of card stock. History and instructions of the model are on the inside front and inside rear cover. Both are in Polish but there are two pages of detailed diagrams, both printed on both sides, to help non-Polish readers to build the model. . The kit contains a detailed suspension system, transmission system, engine and interior. Parts to be reinforced are marked with "*" and "**" for double reinforcing.
Construction: Start construction by building the frame of the vehicle. Now build the suspension and springs and glue to the bottom of the frame. Build your axles and transmission and glue to the bottom of the frame. Build the engine and mount to the frame connecting it with the drive shaft to the transmission. Build the cab and front of the vehicle, you can build it so the hood is open to display the engine. Build the gas tank and glue to the proper position. Start on the interior by building the brake, gear shift and steering column and wheel. Build the windscreen attaching it to the front of the cab. Now start constructing the top of the vehicle, there is a page with templates to make wire supports for the "rag" top. The rear cover shows pictures of the completed vehicle and it looks like they painted the supports with a gold paint.
First Impressions: A highly detailed model that is in a big enough scale to effectively display all the detail. The large size tends to make larger parts which are easier for beginners to handle. If you can work from diagrams and have have the patience to do the detail work, this will make a great model for you to display.
| Sd.Kfz.250/3 Greif | Published by GPM |
| Designer: | Grzegorz Pomorski |
| Description: | German WWII Half Track |

Kit: This model comes in a booklet that contains 10 pages of A4 paper and card stock. Eight pages of card stock contain all the parts to build the model and two pages, printed on both sides, contain detailed diagrams showing how the model is to be built. The inside front cover contains specifications and instructions on the vehicle both are in Polish. The rear cover contains a four view of the completed model with position of parts marked on the diagrams. Model contains engine with all details, transmission, radiator, radios, suspension and many other small details.
Construction: Start construction by building the detail parts. Build the engine and attach the generator and oil filter to the engine. Build the transmission and drive shafts, build the radio rack and the radios finally build the six jerry cans. Construct the bogies and build the track, run the track over the bogies. Cut the parts out needed to build the hull of the vehicle and assemble the basic hull. Insert the completed engine in the front of the vehicle, build the seats and glue the gear shift, steering wheel and brake pedals inside the cab. Glue the radio rack and radios into the cargo compartment. Start adding the details around the vehicle, attach machine guns and shields, glue the rifles into the rifle racks and position the jerry cans in their positions. Build the frame that surrounds the cargo compartment, you may want to use thin wire to do this.
First Impressions: A highly detailed model with many small and fine parts. This is not a model for a beginner nor one for someone who does not have fine motor skills or the patience to take the time to do this model credit.
| Sandomierz | Published by GPM |
| Description: | Town Hall & Tower |

Kit: This two model kit comes in a booklet that is slightly larger than A4 in size. The booklet contains eight pages. One paper sheet has a diagram of the Town Hall with details and their placement. The other paper sheet contains formers that are to be glued to a heavier card stock. The inside back cover contains photos of the completed model and a diagram of the tower with location of parts indicated. The inside front cover has a history of the buildings and some instructions, not many, in Polish. Both the Town Hall and the Tower have a base which will help with displaying the model.
Construction: Cut out the base and formers on the paper page and glue to a heavier card stock. Cut out the walls and glue them to the reinforced base. Glue the roof between the walls. Cut fold and glue the attached tower and out building that goes towards the rear and glue to the walls. Glue the decorations to the top of the building and then cut form and glue the covered entry way to the side of the tower. Glue the stones to the base around the building. Cut and reinforce the base for the tower and then glue the sides of the tower to the base. Build the top part of the tower and glue to the top along with the roof. Cut and glue the decorations around the top and the two small extensions by the entrance.
First Impressions: This would be a great model for a beginner. There are a minimum of parts and they are large enough not to require a lot of motor skills to cut, score and fold.
| Ballard, Narwhah, PBY-3 & SOC-1 | Published by |
| Designer: | Bartosz Czolczynski & Jan Schmidt |
| Description: |

Kit: Another 1/400 diorama presented in booklet form by JSC. This one contains the Tender , former Destroyer, USS Ballard and the Sub Narwhal. Also included are two PBY-3 Catalinas and three SOC-1 Seagulls. The kit contains a double page water base to display all of the above. The booklet contains four pages A4 in size, two pages are the water display and the other two are the parts for the two ships. The aircraft are all located on the back rear page. There are four pages of instructions and history included, all in Polish. If you can read these pages you will want to copy them as parts are located on the back side of three of them.
Construction: Remove the two sheets of water base and glue them to heavy card stock so that your diorama will have some strength. Cut out all the formers and base for the ship and sub and glue to heavy card stock. Glue the formers to the base, then glue the decks to heavy card stock and then glue them across the top of the formers. Glue the sides of the hull between the deck and the base. Build the superstructure for both ships. Build the guns for both ships and place where indicated on the deck. Build the funnels and lifeboats for the tender and glue to the deck and davits. The five planes for the diorama are located on the back page, cut the parts out and assemble the planes. Finish the diorama by placing the ships and aircraft on the water base.
First Impressions: The ships are a simple build and should be buildable by anyone with a modicum of card modeling experience. The aircraft are very small and will take a steady hand to cut and glue the parts together.
| LIAZ Dakar 4X4 111.154 | Published by VMOS |
| Designer: | Jiri Vintr |
| Description: | Offroad Racing Truck |
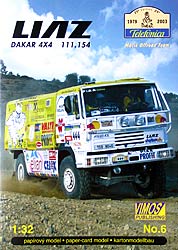
Kit: A very colorful Panel Truck in 1/32 scale that comes in a folder. The folder contains five sheets of A4 card stock. A history and instructions in both Czech and English are on the inside front cover and diagrams are on the inside back cover. This is a very detailed model that has a detailed engine, transmission and suspension. The model can be displayed with the cab in the up position so that the engine and transmission can be displayed. As with race cars in the U.S., the truck is just covered with very colorful advertisements all over the cab and panels.
Construction: Start construction by building the suspension. When done build the engine, drive shaft and transmission and glue to the suspension. Build the fuel tank and glue it below the suspension. Build your axles and wheels, glue the wheels to the axles and then the axles to the bottom of the suspension. Build the cab and fit it to the suspension either in the up or down position. Build the cargo section of the truck and glue it to the suspension behind the cab. Add bumpers and lights to the truck and you are finished.
First Impressions: A very detailed and colorful truck but not one that I recommend for a beginner. There are many small and detailed parts included so you should have some experience before attempting this model.
| 2S1 Gozdzik | Published by Quest |
| Designer: | Grzegorz Molenda |
| Description: | Russian 122mm Self Propelled Howitzer |

Kit: This kit comes in an odd sized booklet that is larger than A4 but smaller than A3. The booklet contains 10 sheets, four of which are paper and the other six are card stock. Detailing of this model is exterior and there is no internal detail. There is a very short part in Polish that contains a brief description, technical specifications and instructions. This is on the inside front cover and the rest of the page is covered with diagrams. Both the inside and back of the front cover contain additional diagrams to help you build the model. Guns will elevate and the turret rotate. Hatches can be displayed in the open or closed position.
Construction: Cut out all the parts on the paper pages and glue them to a heavy card stock. Using the parts you just reinforced, build the frame for the hull and the turret. Cut the skins out for the hull and glue them to the frame. Cut out all the parts for the suspension and bogie wheels. Build these parts and then glue them to the bottom of the hull. Cut out all the track parts and glue them together to make the track, then glue the completed track around the bogies. Build the main gun and place inside the turret frame, if you want it to elevate do not glue. Cut out the skins for the turret and glue over the frame and main gun. Detail the vehicle at this point, determing if you want the hatches to be open or closed. Place the turret in the hull, do not glue if you intend to have the turret rotate.
First Impressions: A great addition to anyone collecting modern day military vehicles. Does not appear to difficult too build but there are a large number of small parts that will require good motor skills and patience.
| P-47M Thunderbolt | Published by DeWayne Barnett |
| Designer: | Marek Pacynski |
| Description: | WWII USAAC Fighter |

Kit: This kit is delivered across the Internet in PDF format. You will need Adobe Reader and an ink jet printer to print the model out. The kit prints out on A4 paper but if you do not have this size paper you can use Adobes print to fit function to get the model on U.S. size card stock. The model is delivered on four pages, a cover sheet, a sheet with history and specifications which also contains a construction diagram and two sheets that contain the model itself. The model does not contain a cockpit or wheel wells. The canopy is of card stock and the landing gear is glued to simulated wheel wells in black on the bottom of the wings and fuselage,
Construction: Parts to be reinforced are marked with red and you should cut these out and glue to a heavy card stock before proceeding. The fuselage is built using the "butt and glue" method. You build each fuselage section with a former in each end and when done butt glue the sections together to complete the fuselage. Build the engine cowling with the printed engine and when finished glue to the front of the fuselage. Cut the formers out for the wings and tail section and glue through the fuselage. Cut the skins out for the wings and tail and glue over the formers. Build the canopy out of the card stock and glue to the top of the fuselage. Build the landing gear and wheels, glue together and then glue to the black areas on the bottom of the aircraft. Build the propeller and spinner and glue to the front of the model.
First Impressions: Another great model by Marek and one that I have been looking forward to. This is not a model for a beginner but it is a good model for one who is looking to move up to models that use internal formers.
| Aurora | Published by Quest |
| Description: | Russian Armored Cruiser |

Kit: This is a 1/200 scale kit of the Russian Armored Cruiser built in 1895. The model comes in a booklet that contains 18 pages. 10 of these pages contain the exterior parts of the ship on card stock. Four pages have interior formers that are to be glued to a heavy card stock for reinforcement. Three pages, printed on both sides, contain detailed diagrams which will help you in construction of the ship. There are two pages of history and instructions in Polish included. Parts are provided to build either a full hull or waterline model. A stand is also provided which will be needed to display the full hull model.
Construction: Decide if you want to build the waterline or full hull model and cut the formers out for your selection. Glue the formers to heavy card stock. Build the frame which is of the standard egg crate system. Cut out the decks for the ship and glue to heavy card stock and then glue the deck to the top of the formers. Cut the hull sides out and glue then between the base and deck. If you are building the full hull model, glue the bottom hull plates over the bottom formers. Build the superstructure and funnels and glue to their appropriate place on the decks. Build the guns and barbettes and place the guns that go in the barbettes inside and guns that go on the deck in the correct positions. Finish the model up by rigging the ship following the diagram provided.
First Impressions: A nicely detailed ship. Not a model for a beginner, I recommend that you have card modeling experience especially in ship building before attempting the model.
| Kosciol Gotycki W Gryfinie | Published by Modelik |
| Designer: | Ryszard Adamczewski |
| Description: | 1290's Polish Church |

Kit: This model comes in a booklet that contains 15 pages of paper and card stock that contain the parts to build the model. The inside cover contains a brief history and the instructions to build the model both in Polish. The front and back cover contain diagrams with parts marked on them. This will help those who do not read Polish to construct the model. A two page base is provided to display the model on. Parts to be reinforced are marked with a star and those to have parts cut out are marked with a pair of scissors.
Construction: It is difficult for me to describe the construction process on this model for two reasons. First the instructions are in Polish, which I do not read, and the lack of diagrams. All I can do in this case is give some general tips on building the model. Cut out all the parts marked with a star and glue them to a heavy card stock. Cut out the indicated sections marked with scissors. Take the base, which you have already reinforced, and lay it out on your building surface. The building appears to be built in several different sections. Cut the walls out for the main section and glue them to the base and then glue the roof over these walls. Build the three extensions on the front of the church and then proceed to building the tower that is on the side.
First Impressions: Due to lack of instructions
and diagrams you should not attempt to build this model unless you have experience
in building card models. The model does not seem to be to difficult to build
and parts are fairly large so if you can figure out the method of construction
it should not be too difficult to build.
Mitsubishi A6M2-N "Rufe" (Zero-Sen floatplane variant) |
||
 |
Description: | Single engine JNAF floatplane fighter |
| Kit: | P.Model A6M2-N floatplane | |
| Scale: | 1:32 | |
| Designer: | K. Gondou | |
| Format: | Download as a password-protected PDF file containing 7 pages of instructions and diagrams, and 10 pages of parts (including one page of parts for the transporter). Pages are in A4 format and should be printed on A4 or legal size paper. | |
| Parts: | 360+ (including 40 parts for the transporter) | |
| Difficulty: | Intermediate to advanced | |
Kit: The kit represents an A6M2-N "Rufe" of the Japanese Naval Air Force from early in the Pacific war. Although the instructions are in Japanese, there is relatively little text involved, and construction relies mainly on seven sheets of highly detailed, very carefully drawn and sequenced assembly diagrams. These should be more than adequate once the builder becomes familiar with the construction of P.Model kits.
The artwork in the kit is extremely good for a print-it-yourself model, and easily surpasses some of the better printed kits on the market. Panel lines and rivet detail are very finely done, and there is subtle shadow detail where parts like ailerons join the main structure. Coloring is generally very good, though I would question the accuracy of some of the colors used (especially the anti-corrosion paint used for interior structures). There is no weathering; the aircraft is "factory fresh."
As with other P.Models, there is only an opaque canopy and no attempt at cockpit detail. Nor is there any engine detail apart from simulated cylinders printed on a flat disk. Given the scale of the model, the large number of parts and the high level of exterior detail, I would have expected a detailed cockpit and some attempt at three-dimensional engine detail. Even without a detailed cockpit, however, I would recommend cutting out the simulated glazing in the canopy and substituting some kind of transparent material.
Construction: Construction follows a basic tab and bulkhead method, but with the option of cutting away the tabs that are printed as part of the fuselage and wing sections and substituting gluing strips that allow for a much smoother finished surface. Construction diagrams are extensive, as I mentioned earlier, but they have to be studied very carefully if mistakes are to be avoided. I would recommend printing two copies of the kit, and using one to practice construction steps that that might otherwise be confusing.
The wings use a long rectangular box structure for a main spar. Each wing section comes in two pieces: one that attaches to the spar on the bottom and folds around its leading edge to form the upper surface, and one that glues to the bottom of the spar and attaches to the upper surface with tabs at the trailing edge. Most of the remaining assemblies appear more or less conventional in terms of construction. The transporter is a nice touch and helps make the model a good candidate for some type of diorama setting.
First Impressions: This kit looks like it will build into a beautiful display model, especially considering the quality of the exterior art work. P.Models continue to set a very high standard in this category. The complete lack of cockpit and engine detail is the only major drawback I can see at this point. I would rate the skill level at intermediate for someone who wants a reasonably quick build using the simpler assembly options. More advanced skills may be required if the more difficult construction options are selected, or if one wants to try his or her hand at filling in some of the missing detail.
Bill Geoghegan
Messerschmitt Me-410A-1 Hornisse ("Hornet") |
||
 |
Description: | German twin-engined light bomber (1942) |
| Kit: | Kancho Iliev 12/2003 | |
| Scale: | 1:48 | |
| Designer: | Kancho Iliev (Bulgaria) | |
| Format: | Eight (8) PDF files (totalling 4.6mb) to be downloaded and printed. One file contains six pages of background and building instructions. Of the remaining files, 4 contain one page each of required parts, and 3 contain one page each of optional parts (interior construction, cockpit, engines, detailed landing gear, etc.). | |
| Parts: | Approximately 180 with all advanced options selected; less than 100 with none selected | |
| Difficulty: | Beginner (simple version) to Intermediate (with advanced options) | |
Kit: With the Me-410, Kancho Iliev has published what I believe is his first multi-engined aircraft design since the PBY ("Catalina") two or three years ago. The engineering of his models has changed dramatically since that time, but it is still unique within the industry, and it represents a very effective blending of best practices from other top designers, such as Chip Fyn and Emil Zarkov, to mention two, and his own innovations. The result is different, but effective. For example, the fuselage is built up out of cylindrical sections joined with tabs or gluing strips. But there are no bulkheads required to enforce the shape and provide rigidity.
Construction: Kancho's designs are also becoming more detailed with time. His N1K1 ("Rex") floatplane is a good example (see the December 2003 issue of Card Modelers Online). The Me-410 has a very detailed cockpit (and keep in mind that this model is in 1:48 scale), two detailed engines, and an intricate landing gear. All of this can be skipped, however, by using an opaque canopy, minimal engine detail and a simple version of the landing gear. Kancho also provides options for how the tabbed construction is handled. Fuselage segments come with attached tabs if you wish to use them. The downside is visible layering of one segment over another. The alternative is to cut off the attached tabs and to use tabbed gluing strips provided on one of the optional sheets.
First Impressions: This looks like a first-rate kit from a very productive and innovative designer. If I'm pressed to find fault somewhere, it might be that the line art (panel lines, parts borders, etc.) could be a little narrower. They are a little heavy for my taste, but this may be more an artifact of the software Kancho is using than anything else; and it's probably not an issue unless you intend to increase the size of the model. In all other respects, it's a beautiful kit, and one that I look forward to building. Not a design for a beginner, but any modeler with experience in building a few aircraft in 1:50 or 1:33 should give it a very serious look.
Bill Geoghegan
This column does not cover all the new card model aircraft and ships that have been released this month. It contains only those models that have been sent to me by dealers and designers for review or that I have purchased for review. Due to space restrictions, some models sent in for review may be held over until next month.
Thanks to the following for providing kits for inspection and review:
