Photos by the author
After building all the bigger Erkotyp kits (Pardubice, Rozmberk, Postorn�, Romantic Castle and Pohansko) I decided to get and build the smaller ones. At first, the idea was just to have the complete set and I thought, wrongly, that any of the small kits would be just a piece of cake to make...Smaller, for Erkotyp, means simpler but not really easier. The number of parts for this kit, 'The Red House of Ceska Lipa ', is a modest 124, finely printed in four (or rather 3.5) A4 sized pages - see Picture 1.

Picture 1 - The kit.
You can check that most of the parts are small, for recessed doors, windows, chimneys and the kind of detail that makes the charm of Erkotyp kits.
I never complained about the complexity of the bigger kits but warned everyone to be sure to have the time and patience needed to build any of them. For those who are not sure, this one should be a perfect start and a good test.
The instructions, as usual, are in Czech, as well as a brief history of the house. The diagrams, for those (like me) that don't understand Czech, are well enough - see Picture 2.

Picture 2 - Diagrams, history and instructions.
The numbering of parts is not an indication of the construction sequence. I think that this is not a problem but makes necessary to study the diagrams, in order not to get to a dead end. Maybe the instructions address this.
The idea is to build the walls and other assemblies, one by one, and to put the whole thing together at the end. I started with the inner wall, behind the front one - see Picture 3.

Picture 3 - Parts for the inner wall.
There is one thing missing here - the rectangular door in the upper floor. I cut it only after starting to assemble the other parts. Most of the small parts need some 'pre-processing' before gluing them to the wall: folding to get double thickness, painting the edges and so on.
In Picture 4 you can see the inner wall, as finished. Also there, is the lower part of the left wall and the parts for the back wall, already 'pre-processed'.

Picture 4 - Inner and left wall. Parts for the back wall.
Next, I decided to make the roof, the two small windows there and the two chimneys - see Picture 5.

Picture 5 - Roof and parts for the chimneys.

Picture 6 shows the roof with the completed chimneys, as well as the parts for the upper section of the left wall.

Picture 7 - Next comes the front wall - see Picture 8 - already with a lot of work done.

Picture 8 - Parts for the front wall. There are some things to be seen here: the nine columns (viewed from below) and the upper part where they all are to be glued. I roll bits of thin paper in order to give strength, the correct shape and a good base to glue the columns. For the upper part I made a card template first. This makes it much easier to get the complex shape needed and allows the gluing to go step by step. The same technique was used in the upper section of the left wall.
In Picture 8 you can see all the assemblies needed to complete the kit. Everything is already there! The most difficult (but not too much) task is to glue the inner and front walls together, along with other parts shown to the right of Picture 8. The columns were added later and I found 8 of them to be around 0.5mm too short. Looking at Picture 1 you see that just one of the nine is drawn horizontally, and I suspect this is not a coincidence...
The remedy is an easy one: to add a small disk of 0,5mm thick card to the base of each of the short columns. Depending on the assembly method, glue used or the exact spot where you fold, it is possible that just one of them is 0,5mm too long, so you better check first and trust me latter!
Assembling the other parts was pretty straightforward and the end result can be seen in Pictures 9, 10 and 11.
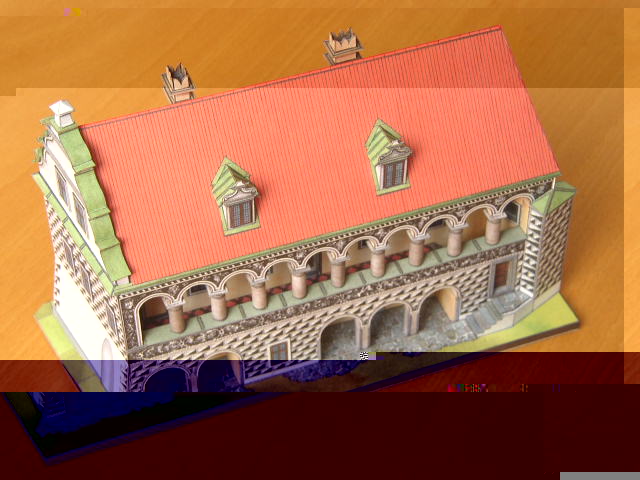
Picture 9 - Completed model - front and left.
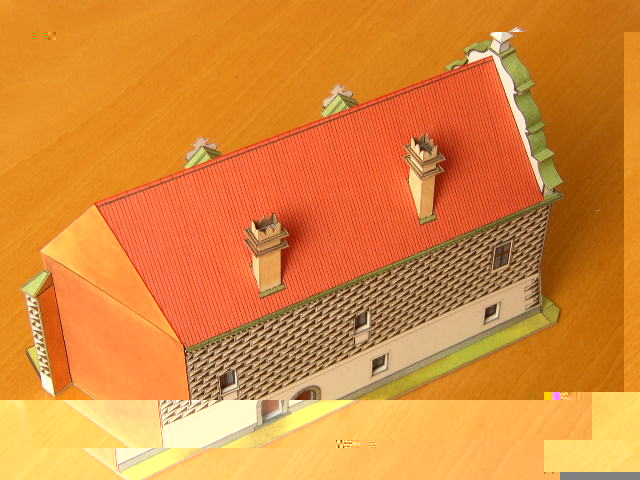
Picture 10 - Completed model - rear view.

Picture 11 - Completed model - a visitors view.
After building any of the Erkotyp kits I get a feeling that paper in the Czech Republic costs a zillion for each square inch. Look at Picture 12 to see what I mean!

Picture 12 - The kit, after cutting the parts. To conclude, let me say that building this kit was a very enjoyable task. As I said before, it is a perfect start for anyone who wants to try an Erkotyp kit but is wary of the complexity and sheer number of parts of their big kits.
