Model and Review by Bob Penikas
Photographs by the Author

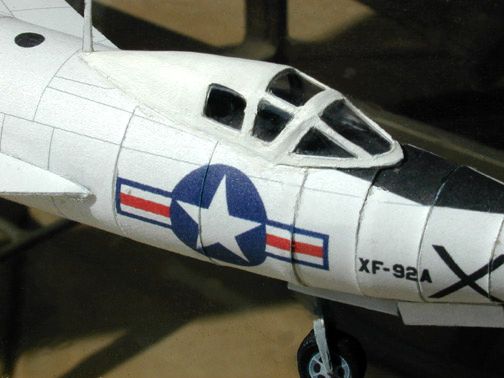
Bruno Campoli is in process of finishing this paper model design of Convair�s first jet delta-wing experimental test aircraft. The XF-92A tests resulted in Convair designing the F-102.
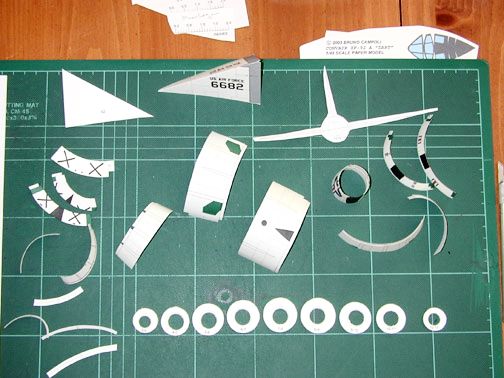
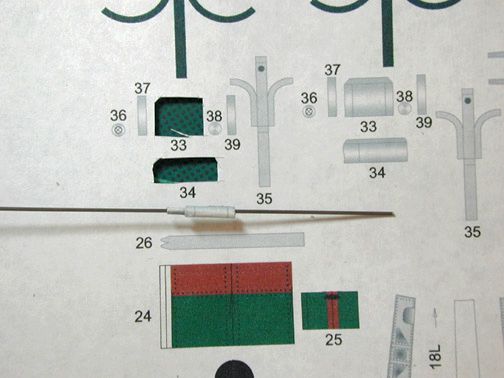
For this beta build Bruno sent four pages of parts and two pages containing three computer generated illustrations and a half page of typed instructions. There were approximately 117 parts to cut out. A zero to two inch scale was provided on the parts pages for cross checking my computer download and printer output.
Noticeable right away was the interesting landing gear that does not attach to the wing. My library and computer research did not turn up any detailed photographs of the extended landing gear. I used this opportunity to also experiment with acrylic gesso as an aid with finishing touches. I hope my doing so doesn't upset the purist paper modeler too much.
The fuselage and landing gear pages were printed on 67lb Hammermill Cover Stock White. The wings were printed on 110lb Hammermill Card Stock White and the bulkhead page was printed on regular paper then glued to shirt cardboard with 3M Spray Mount Artists Adhesive. The parts pages were given a dusting with Krylon Crystal Clear Acrylic.
|
A hole punch was used to remove the bulkhead centers. |
|
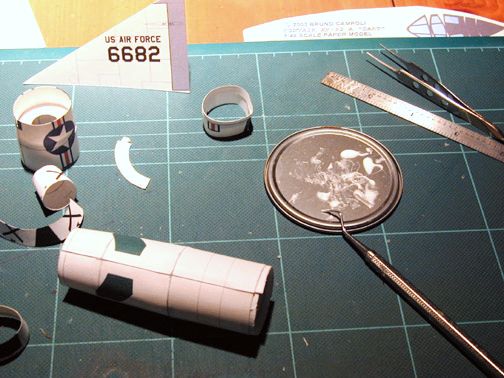
The fuselage sections were rolled around a dowel, the joining strips were then glued to one end of each part and then glued to the appropriate bulkhead. |

|
It was necessary to add three .177 cal pellets in the nose to keep the nose wheel on the ground. |
|
The wings and vertical fin attach with stiffeners making for a sound assembly. |
|
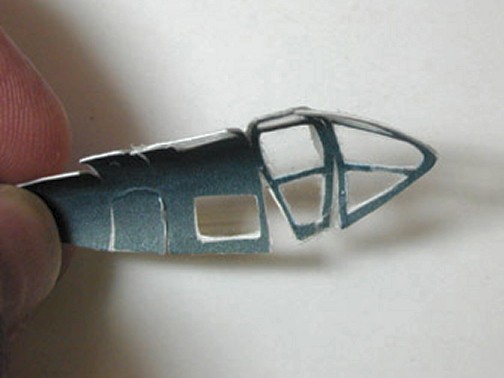
You have a choice between a solid paper canopy or sandwiching a piece of clear acetate between gray inside and white outside parts. I chose the see-through windows. |
|
The canopy fold lines were sanded and Liquitex artists gesso was applied in thin coats with sanding in-between. Acrylic Titanium White was brushed on as a final coat. |
|
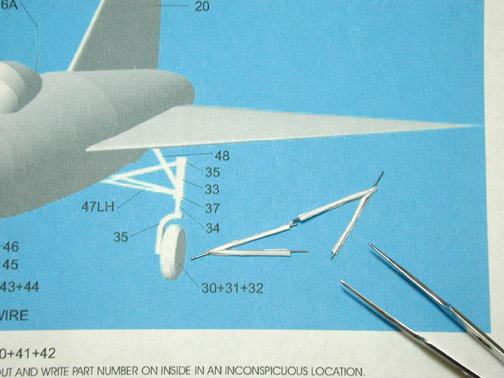
Rolling the landing gear parts around a straight wire. |
|
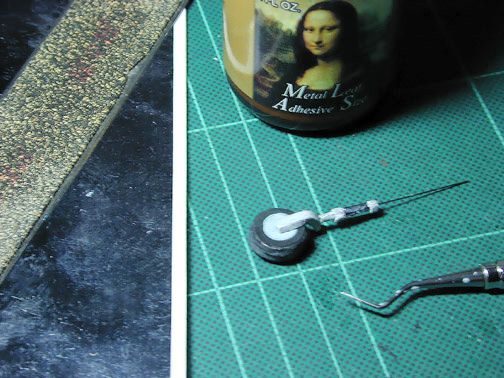
I coated the landing gear with Metal Leaf Adhesive Size prior to pressing on very old bare metal foil that had its adhesive dry up after suffering years of garage shelf life. |
|
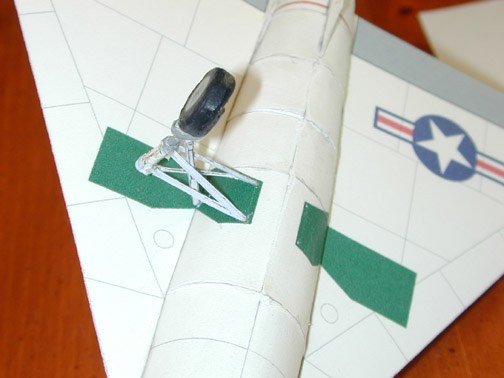
For additional support wire was added to the landing gear struts. |

|
Watercolor was used for �edging� all cut edges, wires added support, and gesso was used as a filler. |
|
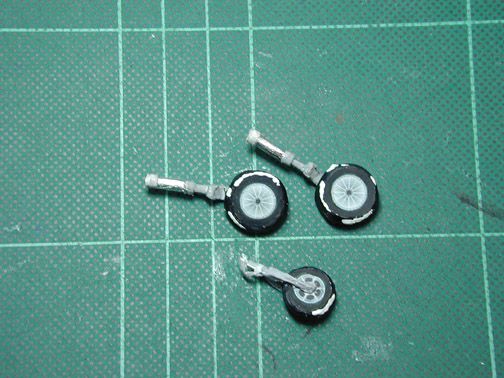
My tires ended up with some minor dimples. Here you can see where the use of a few dabs of gesso built out those voids. A little touch up with Paynes Gray Acrylic paint rounded out the tire. Before adding the gear I had to fight the urge to launch this sturdy model because it screams to be flown. |
|
The wire supports helped tremendously in positioning and attaching the landing gear. |

|
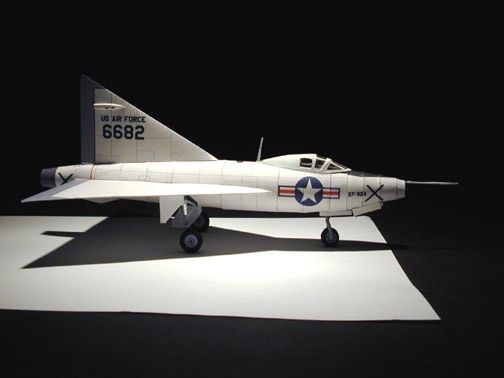
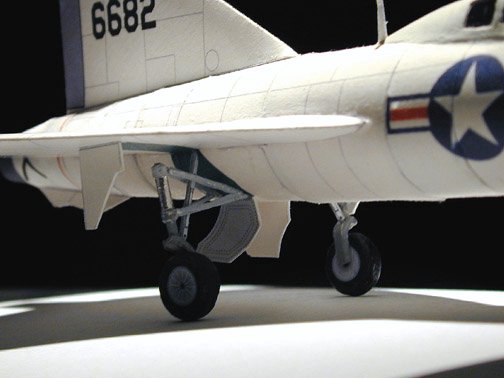
My completed Beta model has a wing span of seven inches. The airframe is a straight forward paper model build with no surprises. Don't forget to add part 21 turbine to the forward end of the exhaust tube facing aft. As it is right now the landing gear will test your assembly skills. Accept the challenge. |
|
Note: I suggest since the model is overall paper white that you give it a good protective coating. My decision to experiment with sanding and gesso applications to the canopy after it was installed required extra unanticipated handling of the forward fuselage. Even though I was conscientious about keeping my hands clean, I expect to see some discoloration over time. Bruno's XF-92A is a real eye catcher. Plan on displaying it on a mirror to show off the unusual landing gear. |
|
 Return to the Main Page