Photos by the author
It's not a dead loss...!
Well, last time we left off on a hopeful note with a fairly successful monochrome beta model and expectations of finishing the project in only one more article. Unfortunately, the best laid plans...! It's looking like a three-parter now, assuming our esteemed editor-in-chief allows me the space.
Wretchedly, my own comments last issue regarding version control came back to haunt me. But, I'm getting ahead of myself - first, paper. Perth, Western Australia, is indeed a stationery backwater it seems! I spent three weeks trying to find satin or gloss card stock around 180-190 gsm and have been totally unsuccessful. A friend I've recently put onto card modelling has had equally poor luck! So we're ordering some 'good stuff' to share. Until it arrives, I'm forced to continue using the same 110 gsm cartridge paper I used for the mono beta. It's far too thin which has a nasty effect on the integrity and quality of the model but is sufficient to prove parts fit, at least in areas where card thickness isn't critical. My colour beta was therefore printed out on this.
Here's a look at the sheets. It was obviously going to be tricky to build, but doesn't it look nice?
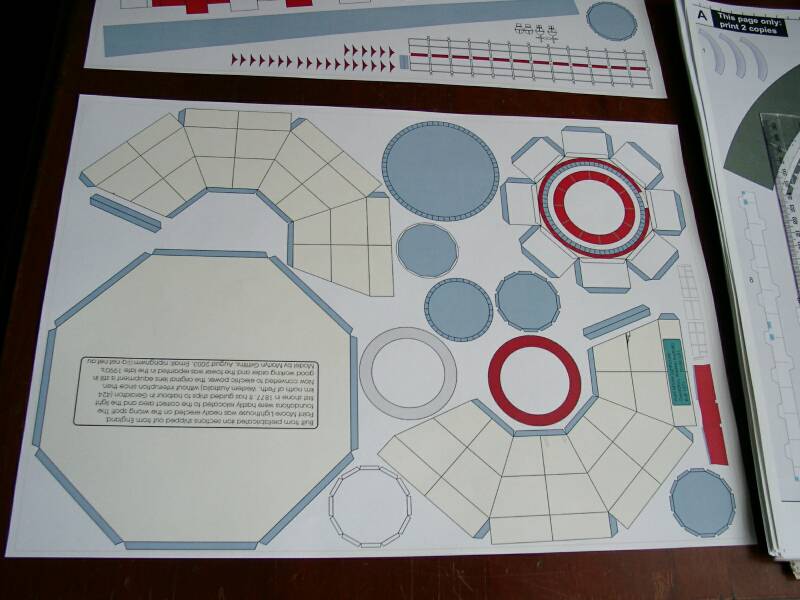
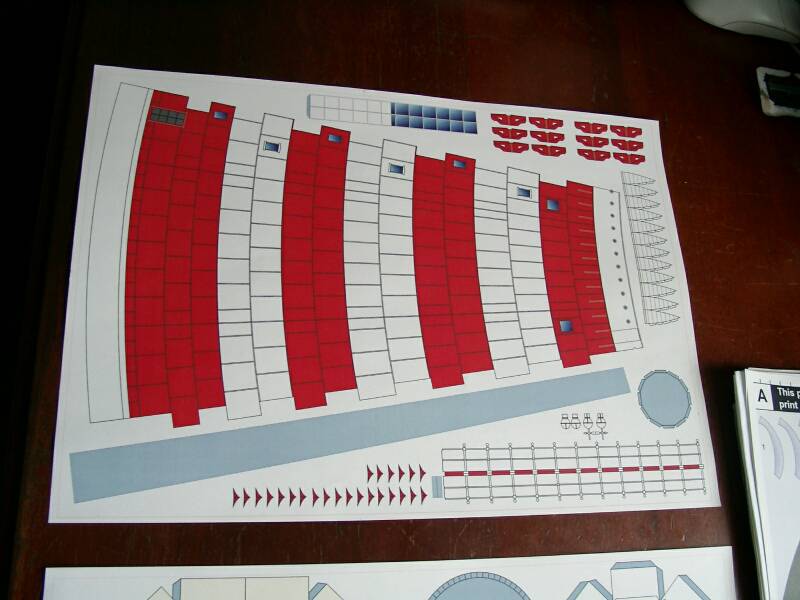
As it happened, printing on disposable paper was really a good thing, because parts fit had actually deteriorated since the first attempt and better paper would have been wasted. These are A3 sheets (which for folk in the Standard-International-challenged parts of the world are 420 mm x 297 mm.) (OK OK 16.53" x 11.69"!)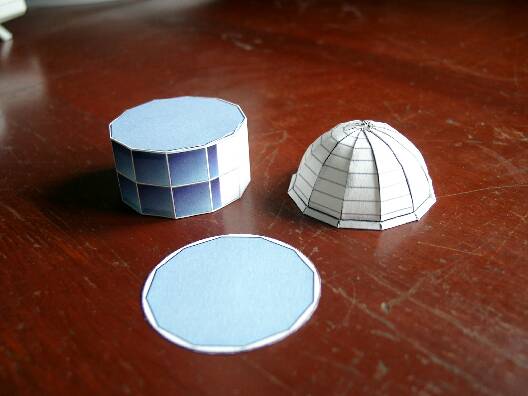
Anyway, here is a rundown of the subassemblies of the model. First off, the dome components - dome, lantern and lantern base. (The dome doesn't look this horrible in real life - honestly!)
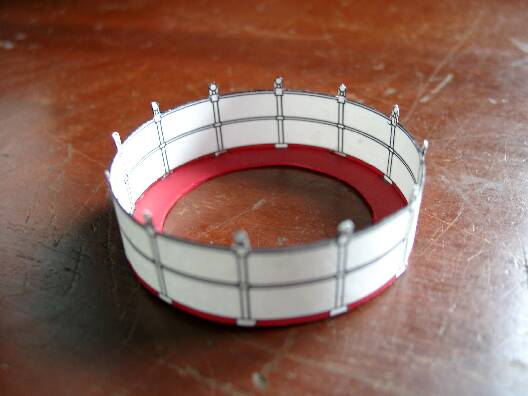
This is the walkway and its railing - the railing could easily be completely fretted out, as the part isn't tiny! You can't see it here, but the part does have crosshatching to represent the expanded mesh of the original.

The tedious bit. These are the 12 walkway supports, awaiting folding. Each is doublesided, with 6 score lines, four of which are on the reverse. Thus each piece has a flattened top to support the walkway, and a pair of flanges to attach to the tower. Realistically, each piece could just be butt-jointed to both parts, but I like to make life hard for myself!

The main tower part.
This is the base, with entrance door, before assembly. The door is four pieces - one piece for the outside, with numerous scorelines both front and rear, and three for the inside framework detail.
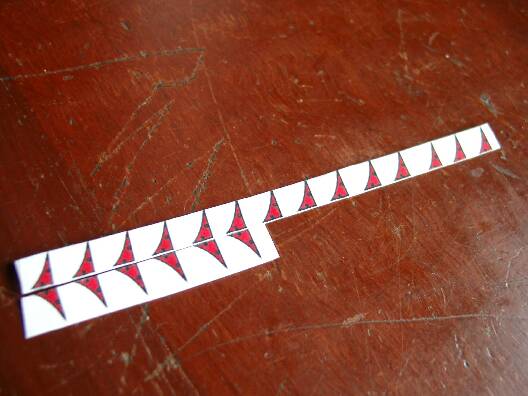
These are some of the 24 small reinforcing flanges which help hold the tower to its base. Each is doublesided and needs to be folded. Tedium again! These DO butt-joint, because I'm not a total masochist...
Weirdly, after cutting began it began to become obvious that some part sizes had changed randomly. Version control! Drat it! I'd gone back to grab parts from some older versions of the drawings after I rescaled the model to 1/87. It's looking like I hadn't taken care of all the individual parts resizing after all - this is despite taking what I thought was enormous care in setting up. For a model much more complex than this, I'm starting to think it would be a good idea to keep detailed records of all parts dimensions in a spreadsheet. No doubt the professionals do...
As a result, some parts fit very poorly - eg, despite enlarging the walkway
railing to fit the walkway better, it was still too small and the discs forming
the walkway had to be forced to fit. Both the formers for the top and bottom
of the main tower cone were too large, and refused to fit. And the two main
parts forming the eight facets of the base were again too small - more so than
the first version despite a substantial redesign AND resizing! This just goes
to show that no matter how careful you think you're being, there's no substitute
for a test model, or three or seven! 
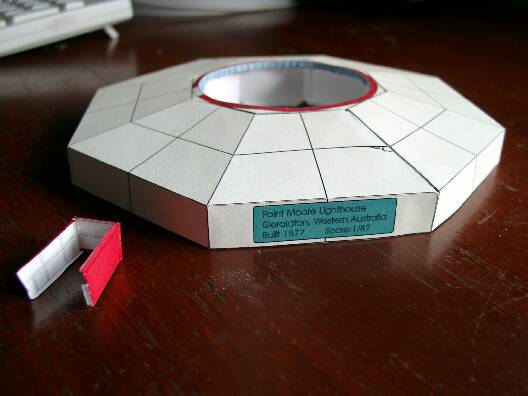
Speaking of the base, here it is again, assembled.
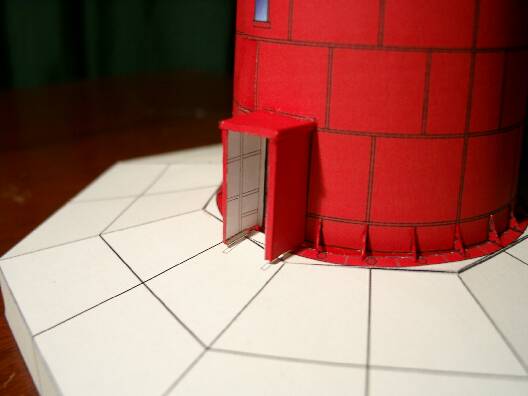
This is the entrance in situ, showing some more of the embarrassing mismatch problems.
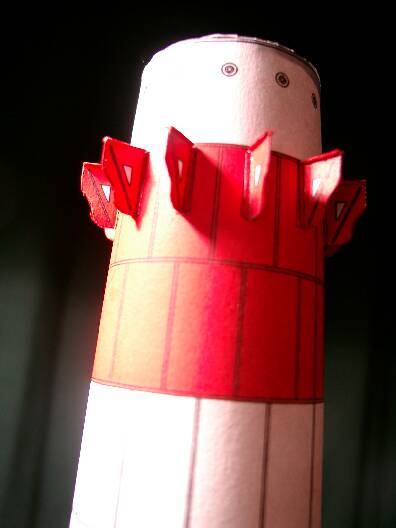
These are the walkway supports assembled, attached and with the white cut edges texta'd in red.

Here is the assembled lantern. I can't wait to do this with proper paper. The paper used on this prototype is terrible to work with!

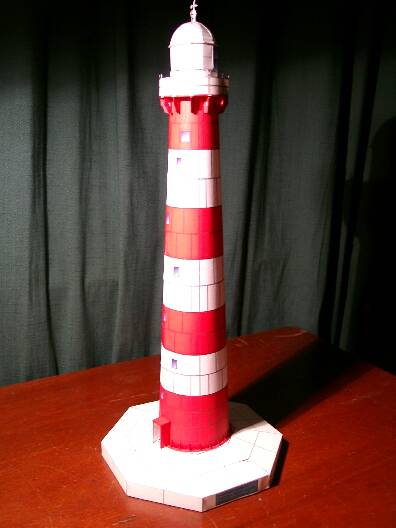
Well, here's the result. It could be worse, and at least I know where the problem areas really are now. And it's a nice red, too. Bikers will recognize this as "SFI red". :)
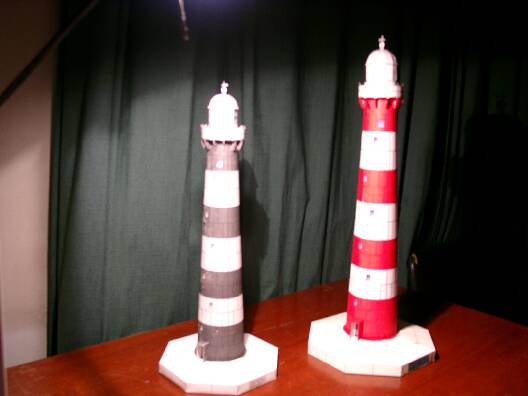
The first colour beta compared with the mono beta assembled last month. (1/100 scale vs 1/87 scale.)
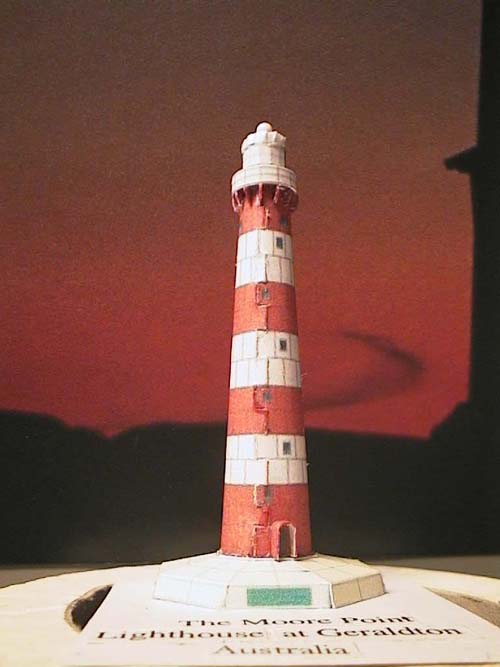

Amazingly, I was beaten to a colour version by Piet Wieringa of the Netherlands. Piet printed out his model from my thumbnail drawnigs from the September issue and built in around 1/500 scale - less than 7cm tall! He has over 96 tiny lighthouse models! Piet kindly agreed to let me show these photos of his extraordinary workmanship - as you can see, this model is really very nice! And the tiny size is unbelievable. He's managed a better cylindrical shape to the tower than I have! I think I'll copy his modification to my base too - the sloping sides look nice and will display the label much better.
Next issue: Hopefully, the long-awaited conclusion to the shiny paper saga. Plus, the actual drawings, so you eager lighthouse modellers can print out a full-res copy of your very own. And, some improvements - I've added some shading to the 'concrete' base, which makes it look much more "concretey". I hope to do more if time allows, and I have photos of the lighthouse taken during the 1980s when it was quite rusty - I hope to do a rusty version of the model too at some point but that's probably some way off. See you next month!
* PS sharp-eyed and knowledgeable modellers will win a prize if they spot the visual reference to last month's column. No actually that's a lie, they won't really, but you may amuse yourself by looking as there is one. :)
