
Photos by the author
A basic "How To"
Recently I was browsing the Scheuer & Struver catalogue and came across a series of kits by Ketty and Alexandre. I had never heard of them before and because the buildings appealed to me and they looked to be good value I decided to buy a couple.
After they arrived I realized that these kits were quite straight forward and the instructions were easy to follow. I had already decided to write a basic "how to make" article and this kit appeared to be an ideal subject.
Most of the techniques that appear below will be within the ability of anyone who has built models and hopefully will encourage beginners to try their hand at card modeling. Although the subject I have chosen is a castle I believe that these techniques will apply to most other subjects.
Because this is a "how to" I will will not spend too much time describing the Castle itself, but will focus on the building process. So you may find that the build jumps quite a few steps at a time. I will, however, say that I was very pleased with the quality of the model, the construction was quite simple and the instructions covered all the main detail. The few additions make it a pleasing subject.
So, let's begin:-
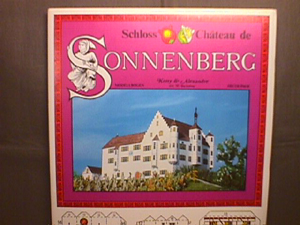
Pic 1. This is the cover of the kit, some of the parts can be seen at the bottom of the page, there are a further three pages of parts.
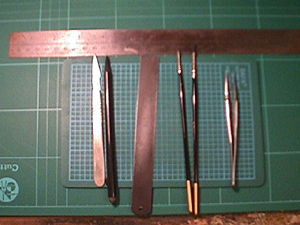
Pic 2. Shows the basic tools needed to make most models. A cutting mat is a very good idea, it saves cutting the dining room table! In the early days I used a piece of window glass, with suitably smoothed edges. Knives, rulers, paint brushes and scissors will also be needed. Although there is quite a difference of opinion on whether or not to colour edges. Also, others will use felt tipped pens.
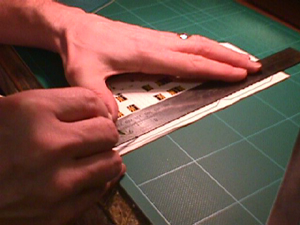
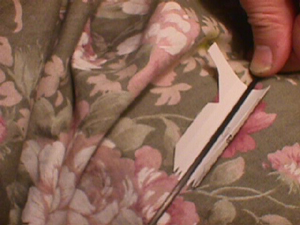
Pic 3. One of the first and most used techniques is scoring lines where parts are to be folded . With buildings this is generally where walls need to be folded round and tabs bent to create the four walls. As you can see I use a metal rule and a knife with a very blunt blade. I cut through the few top layers of the card with the intention of creating a nice sharp corner. I also try to ensure that where possible my rule is on the wall side of a tab so that if the blade does take of in the wrong direction it is only the tab that has the unnecessary marks. Obviously this does not work when scoring between walls so extra care is needed. This picture also highlights another point. When the part consists of more than one wall I use a long rule to score all the base tabs in one go. Not only is it quicker, but it also helps to keep the building square when it's glued to a base.
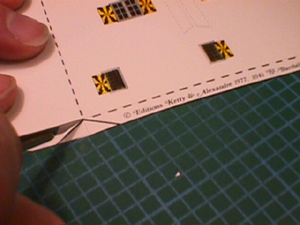
Pic 4. This kit has quite thick lines so, wherever possible I cut out pieces including the line. This also applies to the score lines. For example I always score tab lines so the line is part of the tab. This is not possible where the score line is between two walls, so here I score in the middle the line.
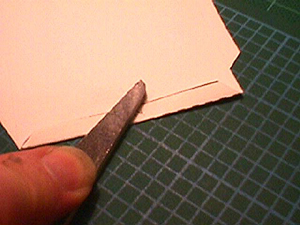
Pic 5. The grey tool is a foam core with glass paper on either side. I use it to remove the gloss coat from the tabs. Although the glue I use appears to work on gloss card I generally try to give the gluing surface a "key". The boards I use are designed for plastic models but fingernail-polishing boards will work as well. Here I have folded the tab right back so that there is no possibility of damaging the wall detail.
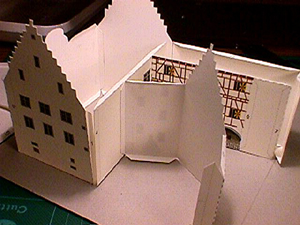
Pic 6. Here I am trying to demonstrate my approach to adding bits to walls. As you will see, the back wall of the main building has two shorter walls attached. In case you are thinking I can't count, the third wall farthest from the camera is part of the building's end wall. The line you can see has been drawn to help placement of the back wall. I always try to add pieces to walls before they are attached to the base to ensure an easier and better placement. Here the three sides of the building have been glued to a base and the fourth wall with its attachments has been glued to the base and will be glued to the rest of the building.
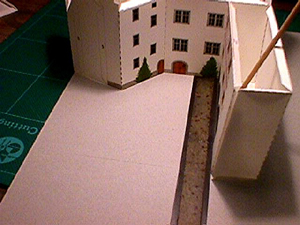
Pic 7. Here is a quick and simple way to ensure that walls are straight and are in the right place. I hold a short ruler on the placement line of the wall and using a short piece of wood, push the wall tab up to the ruler. Put the glue on the base, not the tab. In this way there is less chance of getting glue in the wrong places.
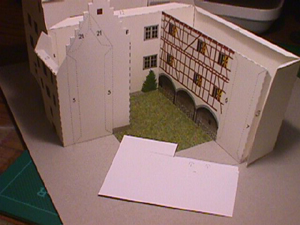
Pic 8. Not quite a basic step. But very worthwhile because the kit did not come with a base. The kit does come with a stiff piece of card as a protection. For a model of this size the card makes an adequate base. However it does mean that the courtyard would then be only grey card. To enhance the appearance I used a small piece of "grass paper". The paper comes from my local railway model shop and is a thin sheet of brown paper with scale grass attached. The point of this picture is to show that I used a piece of scrap paper to get the right shape for the courtyard then transferred the shape to the grass paper.
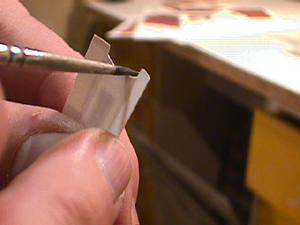
Pic 9. With my models I try to ensure that there are no white lines showing on the fold lines. I also like to match the colour of the paint to the part, even where there is more than one colour. Always paint edges from the back. In this way you reduce the risk of painting the printed surface. When the score line is down the center of a piece I generally fold the piece back on itself so that there is as little of the printed piece showing.
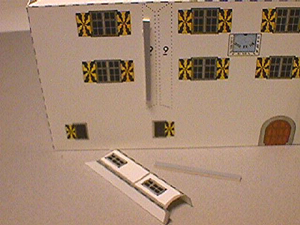
Pic 10. In these days when the modern glues are so strong I sometimes wonder if the kit publishers have a financial interest in the glue manufacturers. The tabs are in some cases unnecessary or just too big. I jest of course, but on many of my models I do remove tabs and rely on the strength of the glue.
Removing tabs has the advantage of giving much cleaner joints. This picture shows another advantage. I have removed the tabs from the small tower and glued thick strips of card on the placement lines printed on the wall. The big advantage is that I am maneuvring two small and rigid pieces of card rather than one bigger floppy piece. For me the advantages are that the tower has an accurate anchor and the joint between the wall and the tower is much crisper.
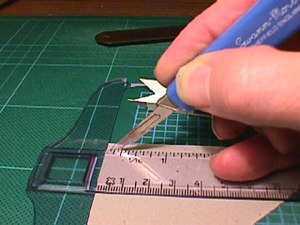
Pic 11. Another more advanced technique is making templates to fit inside towers and turrets. Where I need templates for square buildings I use the tool shown in this picture. First I cut one straight edge on a piece of card then use this tool to create an exact 90 degree angle. It is then a matter of measuring the internal size of the tower and using the distances as the points for the other two sides. I find these templates most helpful at the top of towers. I can dispense with the tabs and know that the tower will stay square when I glue on the roof.
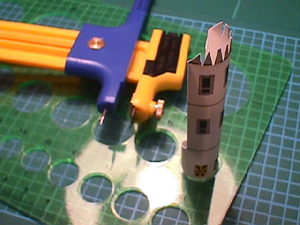
Pic 12. Shows another system for making round template. I use the stencil to find the diameter and the cutter to make the circles. More on this topic later.
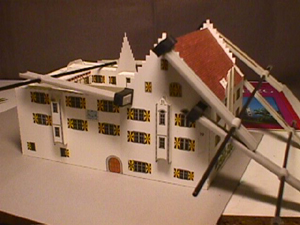
Pic 13. I couldn't resist including this , just to show that scaffolding does help with model buildings !
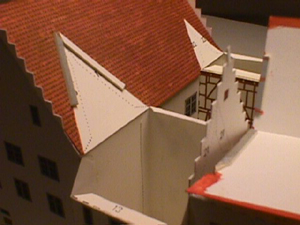
Pic 14. This shows another use of the card supports. Cut off the tabs from the next roof.
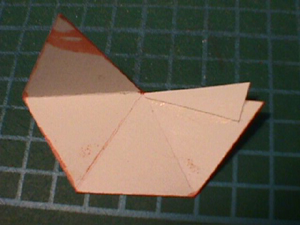
Pic 15. Another tab job. On square and conical roofs I cut off the tabs and glue new ones inside. Once the glue is dry I score the new tab along the roof edge.
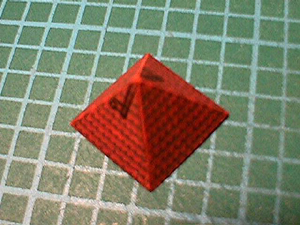
Pic 16. Shows the finished article. If its done properly you can't see the join.
Pic 17 This picture shows my way of creating towers. The rod I'm using is from the scaffolding in picture 13. I use other tools such as round pencils depending on the size of the tube. I also over bend the part so that I end up with a tighter tube than is necessary. This gives a degree of flexibility, which helps when gluing it together. Remember the tab method in picture 15. It works as well on walls are it does on roofs.
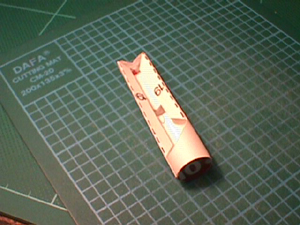
Pic 18. The completed article. You may just be able to see the round template in the top of the tower. There are two further templates further down but these have been cut to fit round the corner of the building.
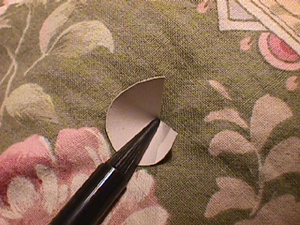
Pic 19. I am using a propelling pencil to shape the roof. This is a very small part so I have removed the tab and will butt joint the edges.
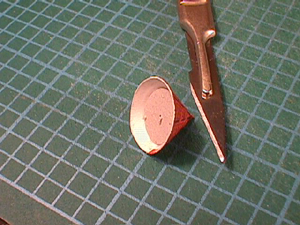
Pic 20. Here again I have used a small template. Not only does it help the butt joint but it also keeps the shape of the roof. Gluing it to the tower then becomes a very easy task.
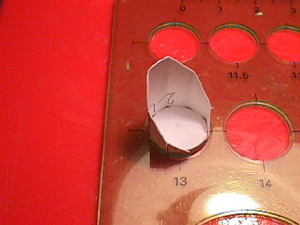
Pic 21. Another use of a template. Here I have used a small disk to support an eight-sided tower. Using a round stencil ensures the symmetry of the tower.
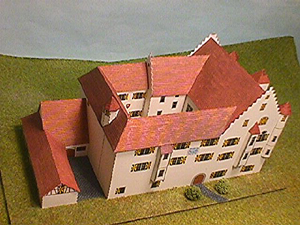
Pic 22. The completed model. I have covered the base in more grass paper and stone paper and added a couple of bushes. The bushes were bought as small-scale trees. It's a simple matter of cutting off the trunks and gluing the "branches" to the base.
Another completed building. I hope that the tips have been of help and make your life a little easier.
Although I said at the start that this was not a kit review I must add that this was an enjoyable kit to build. The parts fit was very good and for me, the subject made a welcome change from the more complicated buildings I generally make. This would make a perfect kit for anyone who has the basic skills and wants to extend their abilities.
