
Here I reached the limits and borders of paper modelling. Of
course I could have chosen to make and bend the cage of round wire or plastic
rods. But I didn't want it to be too multi-media. On the other hand, it adds
much more to the charm of papermodels!
And to close in a real Dutch way: what do I get for my money, the price/quality/fun-factor?
Simply a 10! Just drool over it:
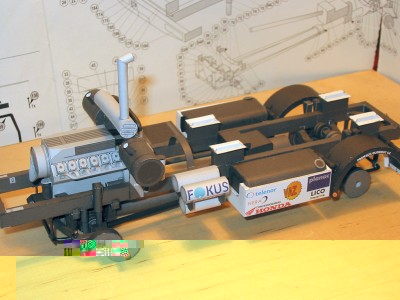
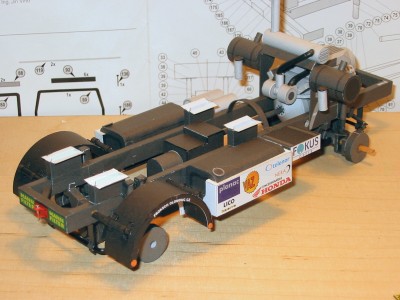
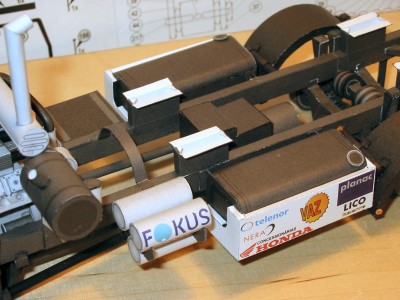
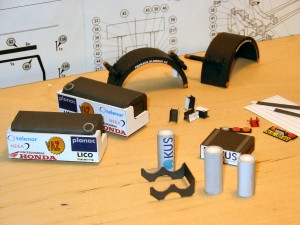 In constructing them no special remarks are to be made; as shown the details
build up in seperate units as little kits by themselves. No real fitting problems
or unclear construction methods. The units are glued on their indicated places
to complete the chassis.
In constructing them no special remarks are to be made; as shown the details
build up in seperate units as little kits by themselves. No real fitting problems
or unclear construction methods. The units are glued on their indicated places
to complete the chassis.
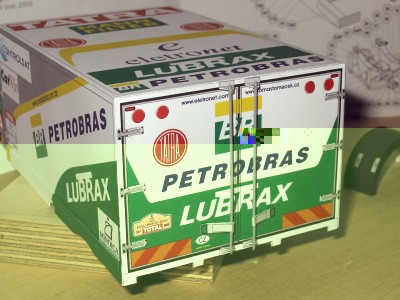
The cargo bay (above) is a fairly simple box. Inside are 3 bulkheads I made
according to the provided template, part 111, using grey cardboard. One can
also choose to scan or copy the template 3 times. It is on the parts page with
some little parts inside, making the original unusable.
Finally details are added. Note the apparent hinges! The kit cover has a big
advert of them on it's back. But they are there on the real car too...
When the chassis is (almost) done, following the partsnumbers,
it is now time to do the cabin of the truck.
Truck Cabin
 This
subject is built up without any bulkheads or reinforcements. "Simply"
cut and fold and glue the various parts the right way! Remember on almost each
part and glue tab it is noted as to which parts it will have to be fixed. When
doing so and with the help of exact fitting the shape arises by itself and there
is no need of any former or bulkhead.
This
subject is built up without any bulkheads or reinforcements. "Simply"
cut and fold and glue the various parts the right way! Remember on almost each
part and glue tab it is noted as to which parts it will have to be fixed. When
doing so and with the help of exact fitting the shape arises by itself and there
is no need of any former or bulkhead.
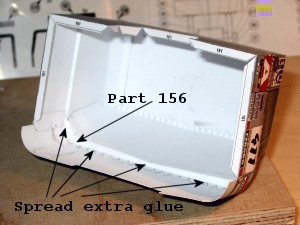
Some caution should be taken when fixing part 156. After scoring
I only cut the front glue tabs, leaving the rear tabs, where the front window
will be attached, with the surrounding paper. This gives extra strength to keep
the cabin front in shape. After drying I spreaded some extra glue at the inside
in the front tabs to maintain the shape.
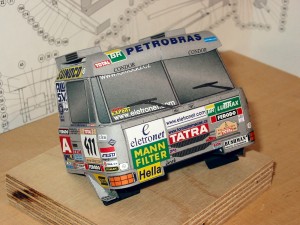 Finally,
the rear tabs are cut and folded upwards to receive the front window.
Finally,
the rear tabs are cut and folded upwards to receive the front window.
Adding the bottom finalizes the main structure of the cabin and can be completed
with many, various detailparts. Some have to be put together from several
little parts, other are just single parts.
On all areas there are no fitting problems, cutting and folding
are clearly indicated as are the places were the details have to be fixed.
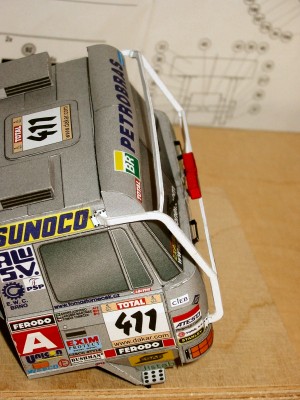 I
did some extra on the roll-over cage on the outside. Originally it should consist
of 2 layers of paper. I found this too thin and flimsy and added 2 layers of
190 gr/m2-paper. This gave the construction much more body. In the original
thing it is made of round tubing whilst in the model it is more or less square.
At this scale impossible (for me!) to make it of paper.
I
did some extra on the roll-over cage on the outside. Originally it should consist
of 2 layers of paper. I found this too thin and flimsy and added 2 layers of
190 gr/m2-paper. This gave the construction much more body. In the original
thing it is made of round tubing whilst in the model it is more or less square.
At this scale impossible (for me!) to make it of paper.
Again following the parts numbers as indicated in the manual,
it was now time to complete the chassis and YES.... I found the
first designers' failure!
Part 174 is meant to be attached between the 2 main struts of the chassis. When
following the design it is not possible, so some adjustment had to be done:
cutting off 2 little tabs of 3 x 3 millimeters. Make 2 incisions of 3-4 millimeters
and fold as tabs... failure restored.
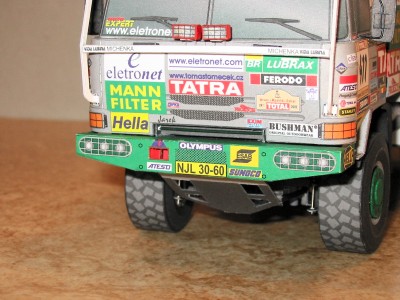
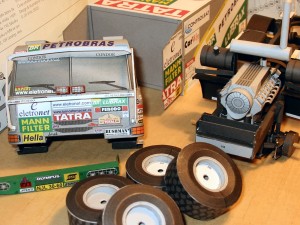 The
front bumper and mudguards are the last parts to finish this chassis unit.
The
front bumper and mudguards are the last parts to finish this chassis unit.
With the wheels done the main units are all ready to be assembled,
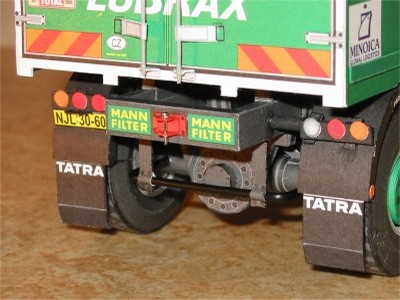
and the truck is completed with addition of some last detail parts: mudskirts,
rear lights, mirrors etc.
I always give special attention to wheels; bad wheels often totally destroy
a model's looks. I have written a guide to wheel-making that can be found here:
Willem Elzerman's Guide to Making Vehicle Wheels.
Conclusion
After reading through this review you can ask yourself "what more
is there to say about this kit?"
It's certainly not suited for the beginner, but the average builder can get
a good result. The quality of it certainly helps by giving a nice sharp
print in clear colors. The indication of scoring and folding is clear too, with
an arrow for a 'mountain-fold' and a dotted-line for the 'vally-folds'.There
are also good indications as to where to attach the seperate parts to each other.
Many sub-structures are built seperate, like little kits by themselves and then
put on the indicated places. The needed parts are almost all in the kit; only
some wire and wooden sticks have to be added.
I found only one little mistake in the design and fitting was almost perfect.
For those familiar with the plastic kit world, this kit has a Tamiya standard!
A disadvantage is the Czech manual, at least for most of us. At some points
I needed little guessing, but it still helps when following the indicated numbering.
Mostly it follows the parts numbering with some deviations. Experience helps
with the guessing.
The large number of parts make it not a kit to do overnight; it needs time.
But the seperate units make splitting this time fairly easy.
Price (02-2003): U$/� 5,50
Quality:
9.5 (almost perfect)
Fun:
Maximum: no fitting- or construction problems.
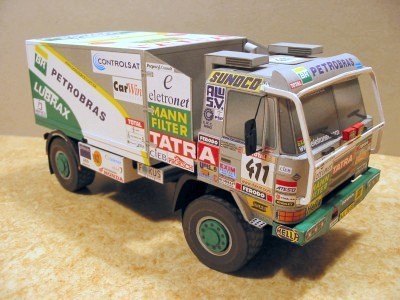

Summary
Model:
Team BR Petrobras
Lubrax TATRA 815 4x4
Kit:
Vimos Publishing No.
5
Designers:
Jir� Vintr (CZ)
Availability:
http://www.maquettespapier.com/
Scale:
1/32
Difficulty:
medium
Number of Parts:
460 (says the manual,
didn't count)
Instructions:
Czech text
Diagrams:
Clear exploded views
Fit:
Excellent
Coloring and Artwork:
Good
Printing:
Good
