
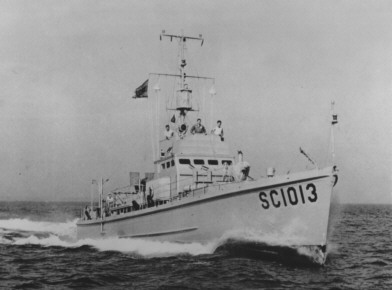
The class of vessels known as "subchasers" originated in WWI. Spurred by the sinking of several vessels in 1916 the US Navy undertook it's own design for an effective anti submarine vessel. Because of the wartime scarcity of metal the call was for the design of a wood hulled subchaser. A naval architect, Albert Loring Swasey came up with a 110 ft. hull design that was adopted by the Navy. Their wooden hulls earned them the nickname of "the splinter fleet". By the time the war ended a total of 440 SC class subchasers had been built. While the wartime performance of the subchasers is open to debate they did provide an effective deterrent to the threat posed by U-Boats.
The WWII subchaser was a direct descendent of the WWI design but benefited from improved weaponry and propulsion systems. Again the ships were wood hulled and could be quickly built. By the end of the war a total of 438 ships were built. The subchasers did not have the glamour of PT boats and were later supplanted by destroyers for anti-submarine duties. As a result even though over 40.000 men served on ships of the class they have been largely forgotten. During the war, however, subchasers played a critical role in providing an effective anti-submarine deterrent, especially in the early war years. In addition to escort and coastal patrol duties subchasers were used extensively for land control during amphibious assaults.
The normal complement on a subchaser was 3 officers and 25 enlisted men. The crews were mostly reservists lacking in the finer points of ship discipline and formality. Many of the officers were recent college graduates, with only 90 days of basic training. These "Ninety-day Wonders" and their freewheeling, often scruffy-looking crews ignored many of standard Navy regulations and settled for their own set of rules. They were called the "Donald Duck Navy" but most subchaser men didn't mind. They were a proud lot and many an ex-subchaser sailor who saw service on other ships says he is most proud of his subchaser days.
The 110 ft SC class subchaser has the distinction of being the smallest commissioned US Navy warship of both world wars. While the 80 ft hulled PT boat was an even smaller vessel PT boats were commissioned in squadrons and not individually.
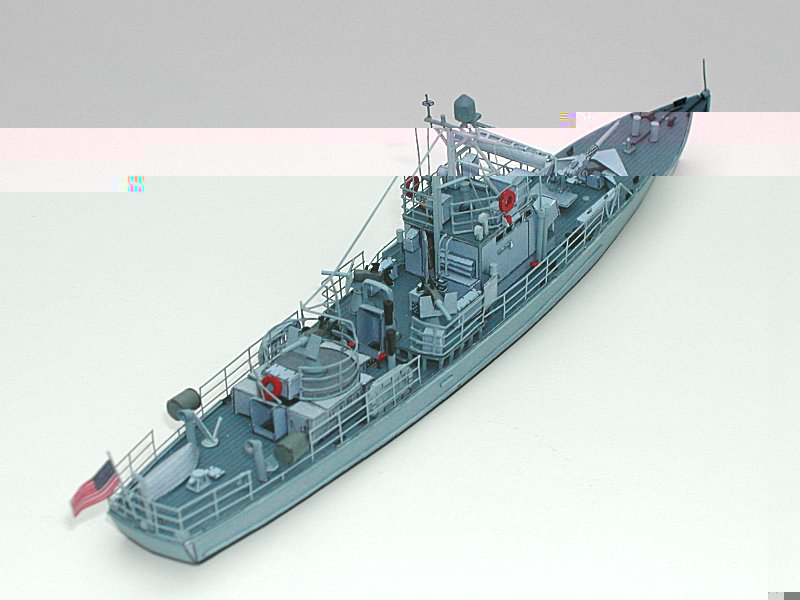
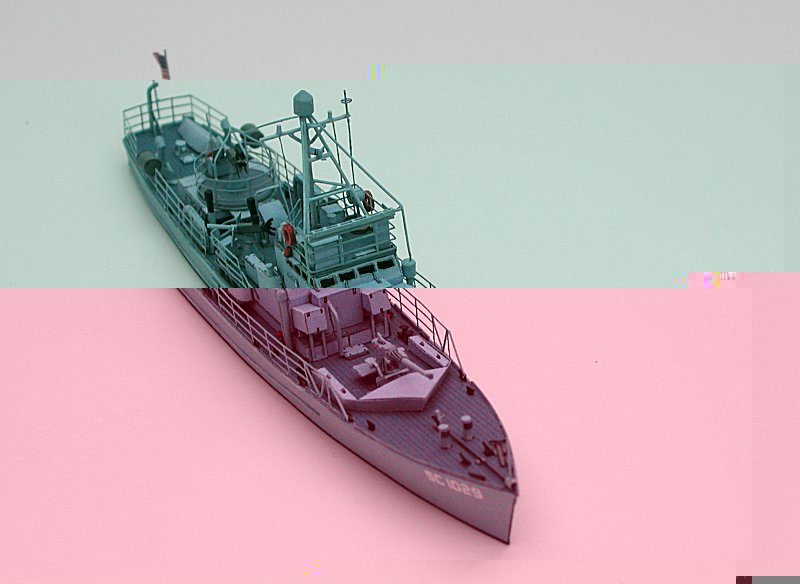
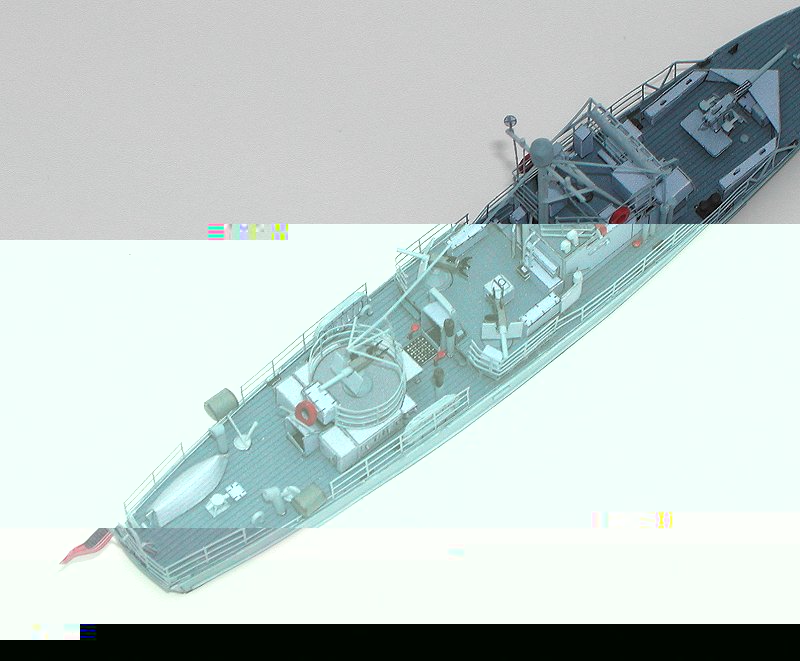
The subject of this review is the Paper Lab 1:250 scale SC class Subchaser designed by Darius Lipinski. At a finished length of about 5 � inches (14 cm) this is a little gem of a model. I have found this to be one of the most enjoyable card models I have built to date.
The model is available on CD directly from Paper Lab or pre-printed from Paper Models International. The model consists of three sheets of parts. This particular hull also sailed under French colors and an optional sheet with French flags and hull markings is also included. One nice touch on the CD is that the parts are also broken into blocks of related parts allowing you to print out extra copies of a needed part without having to use the ink to print an entire page. In addition to the parts sheets an excellent set of assembly instructions consisting of over 50 detailed construction diagrams is also included.
Built at the full detail level this model is easily on a par with the offerings from Digital Navy and HMV. The ship is, however, designed for building by modelers with a range of skill levels from intermediate to advanced and the parts sheets and instructions indicate those detail parts, which are optional.
 Assembly starts with the hull and gun deck (Fig 1-6). For the hull fenders I used the 0.010 square styrene strip recommended in the instructions. I used CA glue to cement the fenders to the hull sides.
 Before attaching the deck to the hull formers I pierced holes for all of the gun deck supports to insure even spacing. For the supports I used the recommended 0.05 styrene rod (fig 7). I slipped a support into each hole in the main deck and once the gun deck was in place secured then to the underside with a drop of CA glue.
 Attaching the hull sides to the formers was the only place I ran into a problem with the model. I found that while the hull sides were the correct length at the waterline they were too short at the stern to reach the end of the main deck. After two attempts at cutting and dry fitting the main deck and hull sides I wound up cutting two small triangular pieces to take up the gap at the stern. I discussed the fit problem with Darius and he told me that he did not run into any fit problems during his two test builds. Perhaps I was not careful enough in fitting the pieces but this is one area where you will want to pay close attention to.
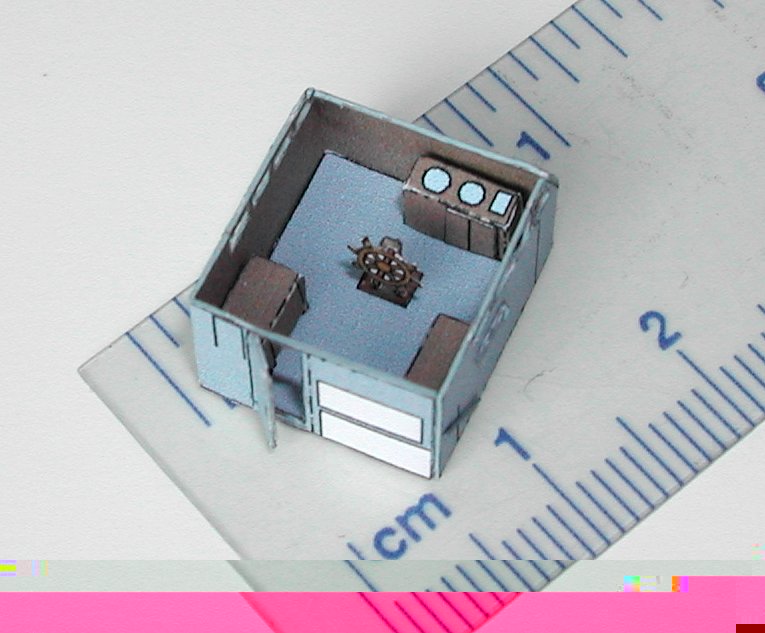 After assembling the deck and hull building the pilothouse (Fig 9-10) which includes a completely detailed interior, comes next. Except for the challenge of building the small scale details you may want to skip the interior since as the instructions warn it will not be visible once the pilothouse is roofed over. Even if you skip the interior you may want to open the pilothouse windows to improve the model appearance. I also opened the pilothouse door as an added detail. Before cutting the door out I reinforced the back wall with some CA glue.
 At this point I deviated from the assembly sequence in the instructions. Instead of attaching the roof to the pilothouse and then adding all of the bridge details with the roof in place (Fig 16-21) I left it off until I added most of the small detail to the fore and aft decks (Fig 11-33). In addition to the roof I did not attach the aft 20mm gun cage or hatchway cover. These parts contain some delicate wirework and I did not want to risk damaging them while working on the other details. Because of their small size I made almost all of the small details from thin paper.
 To help the cabinets retain their shape I used interior reinforcements cut from cardstock. I also found it helpful to reinforce the smallest parts with CA glue before cutting them out and then touching them up with some model paint to match the ships color.
 After adding most of the small details I built the roof and main mast. The front windscreen (part 37) was another part I reinforced with CA glue before carefully cutting out the ribs. I decided to omit the canvas side windscreens (parts 38-38c and 73a) from both the bridge and the aft gun cage because I did not want to obscure the photo-etch railings.
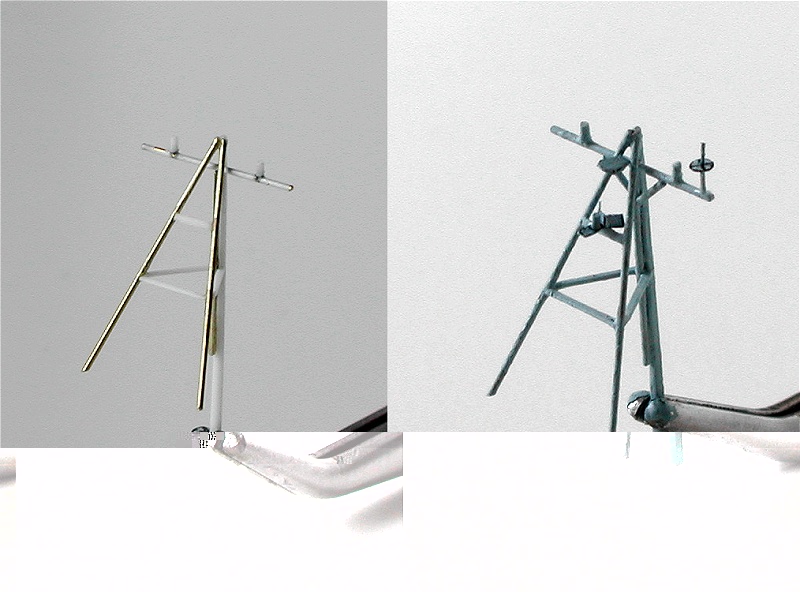 I discarded the kit mast and made a main mast from styrene and brass rod. I did not use the kit parts for the small radar dome (parts 93-93b) but instead shaped one from a piece of styrene rod. If you have a set of photo-etched hand-wheels available you will want to substitute one for part 96.
 At this point I was ready to attach the pilothouse roof, gun cage, and main mast and then rig the ship. I did not want to use thread for the mainstays to avoid placing any tension on the delicate parts so I took a piece of 0.010 strip stock and shaved it down to about 0.005 which I considered and acceptable scale thickness. Fine wire would also work if you have some of acceptable diameter. For the shrouds I used some 0.004 nylon thread.
 With the rigging in place I built the guns. The guns are quite detailed for the scale with the three 20mm guns (Fig 42-44) consisting of 12 parts each and the main 40mm gun (Fig 47-50) consisting of 18 parts. For the barrel to the main gun I chucked a piece of 1mm styrene rod in my drill and sanded it to the desired diameter and taper. You can replace parts 97c on the 20mm guns with some photo etch hand-wheels if you have a set available.
 Before building the life rafts (Fig 39) I cut out the areas between the webbing to provide and additional detail touch. Finally I added the remainder of the small details and photo-etch railings to the aft deck and with the additional of the flag at the stern was rewarded with a completed model.
This is a first rate model. Except for the one problem with the hull sides the parts fit was excellent through out. The finished appearance is very good with a high level of detail. With some photo-etch and careful additional detailing you can create a model that is a veritable miniature museum piece.
In addition to the US subchaser Paper Lab also has a Soviet minesweeper available and Darius is currently in the process of designing his next model, a flower class corvette.

|

|

|
|
|

|
|

|
Summary:
| Model: | United States WWII SC class Subchaser |
| Publisher: | PaperLab |
| Designer: | Darius Lipinski |
| Scale: | 1:250 |
| Difficulty: | Intermediate to advanced |
| Number of Parts: | Approximately 325 |
| Instructions: | English |
| Diagrams: | Excellent |
| Fit: | Very Good |
| Coloring and Artwork: | Very Good |
| Availability: | PaperLab |
| Resources: |
NavSource Photo Archives.
http://www.navsource.org/index.html An excellent source for photos of all types of naval vessels. Splinter Fleet http://members.aol.com/diodor/splinterfleet/index.htm A website devoted to the wooden hulled subchasers of WWII and the men who served on them. Splinter Fleet The Wooden Subchasers of World War II. Theodore R. Treadwell, Navel Institute Press, 2000. A history of subchaser service during WWII. |
