
Photos by the author

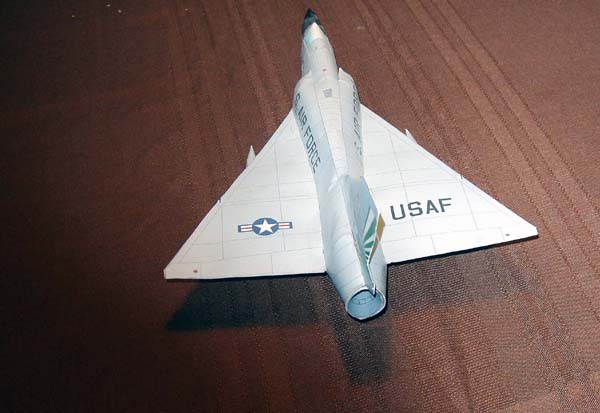
To start this review I have posted pictures of the model taken from the P Model web site to the left of this paragraph. All photos from here on will be pictures of the model that I have just built. This is a 1/50 model that is available from http://www.pmodel.net/ located in Japan. No one on the site speaks English but there is a PDF file at http://www.cardmodelers.org/P_Model that will help if you would like to make an order. The site specializes in modern jets from all over the world and each model will cost you 450 Yen ($3.82) each. They do not take credit cards and you must order using C-Check, much the same as PayPal. You purchase the C-Checks in increments of 1000 Yen and then use it to purchase the model. C-Check is also an all Japanese company and I did have some problems, not because of them but because of a problem in my computer. Thanks to Marc Carson the problem was resolved.
Models are download from the Internet in PDF format. The models vary between eight and 16 pages with one half of the pages being detailed diagrams that will lead you step by step through the construction of the model. Instructions are in Japanese and I found I needed to study the diagrams very carefully as I went through the construction process. The sheets in the PDF file are in A4 format, 11.69 by 8.28 inches, so you will need at least that size paper if you want to maintain the scale. You can of course print on any size paper by using the fit to size selection in Adobe Reader but this means that the model will no longer be 1/50 scale. I purchased legal size, 14 by 8 1/2 inch, 90 pound Exact Index card stock which works just fine.
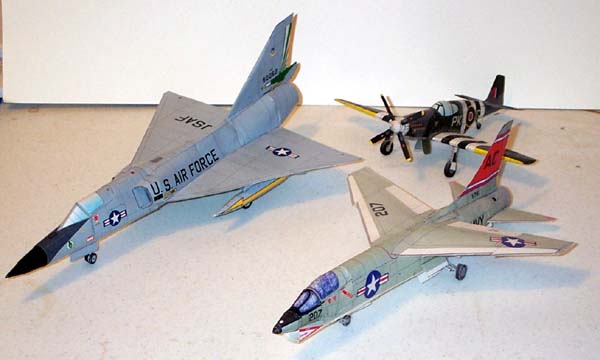
What model companies are these models comparable to? Here is a picture showing
the F-106 alongside the Wilhelmshaven F8U Crusader and Marek's Models P-51.
All three models are in 1/50 scale and fit together in a collection very well.
Notice that none of the three models have clear canopies. Almost all of the
1/50 scale models I have built do not bother with transparent canopies or cockpits.
Construction time for all of the shown models is about the same, I would say
about 20 hours.

Here is a picture of the first sheet of instructions. The model comes on
12 sheets of A4, 8.28 by 11.69 inch, paper. Five of the sheets are the instructions
while the other seven are the parts to make the model. As you can see in the
picture above all the instructions are in Japanese but the diagrams are very
explicit. There are two sets of numbers, one plain and another in circles. The
plain numbers indicate the part number while the numbers in the circle indicate
the order in which the parts are to be assembled. I would suggest that you follow
the order the designer indicates as it worked very well for me. Study the diagrams
to see how the parts are to be assembled, some of it can be confusing. The only
problem I had with this model was in building the intakes. The first time I
did not study the diagram well enough and they did not come out right. Luckily
this is a PDF file and I was able to print the parts out again. After studying
the diagrams more carefully, I got them correct.
Construction of these models is different from any other type of card model
that I have ever built. In all card models that I have built before you build
the model in sections. First build the fuselage, then the wings, then the tail
section and so forth. In these models construction is integrated, you start
building the fuselage and when you reach the place where the wings go you attach
them to the section of the fuselage you have finished and then continue building
the fuselage over the wing. The same thing occurs when building the tail section.
The designer uses no or very few formers but with this integrated method of
construction, the model holds its shape very well. On this model the connectors
are part of the section you are building, this is the same method that Fiddlers
Green uses. Looking at the entire line of models it appears that the latter
models do use connecting strips. I also noticed that the use of formers seems
to increase in the newer models. 
The model can be built with several levels of difficulty. Four missiles
are supplied and the missile bay can be left open to display the missiles. Landing
gear and wheel wells are provided if you want to display the model with wheels
down. If you want to simplify the model you can leave the missile bay and wheel
well doors closed. A stand is provided, as you can see at the top of the review
so you can display your model with all doors closed. As you can see here I decided
to leave the missile bay doors closed, build the wheel wells and landing gear
so that I could display my model on its wheels.
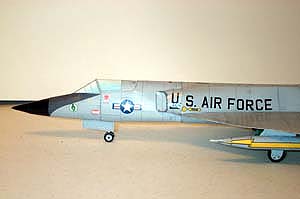
I started construction of the model by following the step by step diagrams
provided. The forward part of the fuselage is built with no internal formers
at all. The first former is installed right behind the intakes. Since I wanted
the model to sit on its wheels I put modeling clay in the nose to weight it
down. Again, since I wanted the model to sit on it wheels I built and installed
the nose wheel well. As we proceed aft we run into the first part of the integration
of the model. You cut out the top and bottom of the wing, both of which have
tabs on them. Fold the tabs up on the top of the wing and down on the bottom
of the wing. There is a "v" cut on the piece directly behind the intakes and
this is where you glue the wings. Do not glue the top and bottom parts together
at this time. Glue the tabs of the top wing to the top of the "V" and the tabs
of the bottom wing to the bottom of the "V". After the tabs are glued to the
fuselage then glue the top and bottom parts of the wing sections together. This
gives the wing the correct shape and helps form the fuselage.
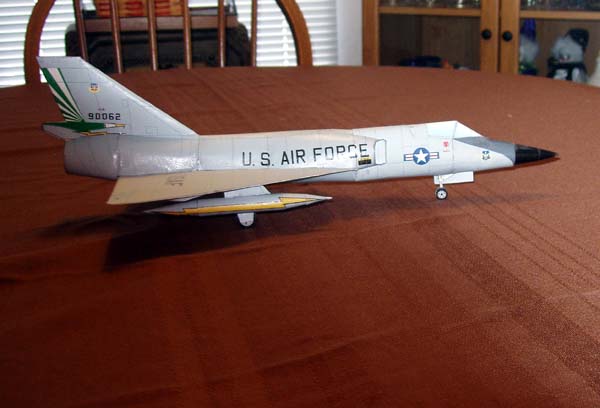
Continue adding fuselage sections and as you add the sections glue the tabs on the bottom and top of the wing to each section.

The second and last former is installed right at the end of the wings. This
former not only shapes the end of the fuselage but also has a part that fits
into the wing to help shape the wing. The tail section contains the rear part
of the fuselage and you have to exercise some careful scoring and bending to
get the correct shape. The exhaust is rather complex and I am not sure that
I built it correctly but since most of it is inside the fuselage it does not
seem to make much difference.
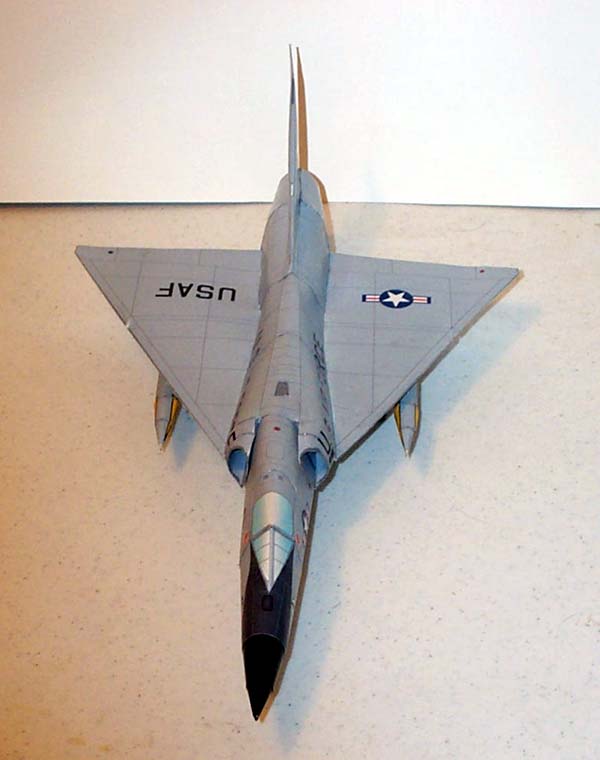
To finish the model up I built the landing gear and wheels. You are given two methods to build the wheels, one which consist of cutting out both sides and then the piece that goes on the outside. The other consists of taking a long thin piece of stock and wrapping it until you have the correct size wheel. I used the first method as I think it is simpler and then I built the two under wing fuel tanks to finish my model.

| Model: | F-106 Delta Dart |
| Designers: | K. Gondou |
| Scale: | 1:50 |
| Dimensions: | 398mm |
| Difficulty: | 3 out of a scale of 5 |
| Number of Parts: | Approximately 155 |
| Time Required: | 20 Hours |
| Instructions: | Japanese |
| Diagrams: | Step by step construction diagrams |
| Fit: | Excellent |
| Coloring and Artwork: | Excellent |
| Printing: | Printed from a PDF file so will depend on your printer |
