
Photos by the author
The Original:
The Douglas X-3 was an ambitious experimental airplane designed for testing suitable features for supersonic speeds in high altitudes. Its layout was rather unusual for its time marked by a long fuselage as well as rather short wings, and as such probably far ahead of its time. Started with great hopes, it turned out that the two Westinghouse turbojets were far to weak to drive the airplane, and it must have been very difficult to fly it at all. Although the project never lived up to the design expectations, the X-3 still managed to break the sound barrier once and the test flights offered valuable data on the use of new materials and the design of other high speed airplanes like the F-104, X-15 or the SR-71. The X-3 made only few flights in its short carrier until it was preserved in the United States Air Force Museum. For more information on the X-3 looked at:
http://users.dbscorp.net/jmustain/x3.htm
http://www.ninfinger.org/~sven/models/x_planes/x3.html
http://www.wpafb.af.mil/museum/modern_flight/mf58.htm
The Kit:
Paper Trade is a young publisher from the Netherlands, which works together with JSC in Poland. Beside some Dutch ships designed by JSC and marketed by SCALDIS, they are also offering airplane models in the scale 1:50. Out of those the Douglas X-3 "Stiletto" and the Northrop YB-49 "Flying Wing" are the most striking ones for me, and I decided to build the model of the X-3. You can find more information about their models on the web page from SCALDIS: http://go.to/scaldismodelclub.nl.
Beside a cover printed in color the kit consist of two A4 pages holding the pieces, one replacement for part 8, two sheets of cardboard, a green transparency for the windows, and four pages with a history of the X-3 and instructions. The text is given in Dutch and English with additional six diagrams to illustrate the assembly. The kit is printed on a high quality paper with a very nice metallic finish for the wings and the landing gears.


The Construction:

The construction started with the assembly of the fuselage to be build from 9 sections, which were connected by connecting strips. The bulkheads were glued on cardboard for reinforcement.

For the assembly of individual sections the pieces were shaped according to the bulkheads. On one end of each section connecting strips were added. The photo shows parts 1 and 2.

As an option the model can be equipped with a cockpit. The assembly of the cockpit parts is straight forward, although the pieces for the thrust panels are awfully small. Cutting out the pieces twice and glue them against each other is not a good solution.
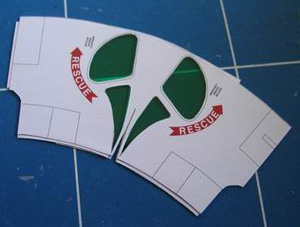
Initially I put the green windscreens into part 3 before starting bending it into the right shape. Somehow this did not work out for me, as the transparency did not want to follow the shape of the paper. At the end I remove the transparency to bring the piece into shape and left the problem behind until the end of the assembly.

Now the cockpit was connected to part 2 and part 3 is in the right shape to cover the cockpit.

After parts 2 and 3 were connected, the construction of the fuselage went ahead by adding part 1 to the end and part 4 in the front. Before connecting parts 3 and 4 the wheel well for the front landing gear was added.
The following three photos show the assembly of the front section of the fuselage. Part 5 consists of three cones and the pilot tube. As the pitot tube is very long, I put some wire into it for reinforcement.
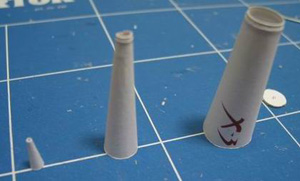
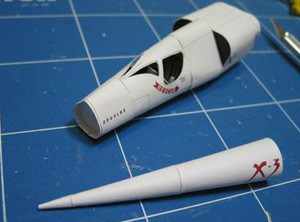
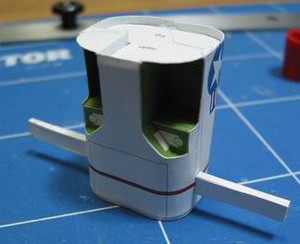
Part 6 makes up the central section of the model holding the spar for the wings and the wheel wells for the main landing gears. After cutting out the doors of wheel wells keep them for later use.
After part 6 was attached to the fuselage, part 7 including the exhausts of the engines was built. Part 7 consists of two sections and the parts for the exhausts. For part 7d it was not clear to me, which side was meant to be up and which one was meant to be down. At the end I decided to place the open part to the top, as it will later be covered by part 8.


Part 8 provides the top of the fuselage. I used the replacement part provided in the kit. Next part 8 is extended by part 9, which holds the tailfin.

Parts 10 and 11 close the fuselage near the cockpit and provide the openings for the jet engines.
Parts 12 to 14 provide the parts to assemble the wings and the tail.


The model was completed by building the landing gears. There are a number of very small parts needed to assemble those, and as already mentioned for the thrust panels, some of them had to be cut out twice and glued against each.
These photos show the assembled main landing gear, the main wheel, and the doors. I place toothpicks into the landing gears for reinforcement.


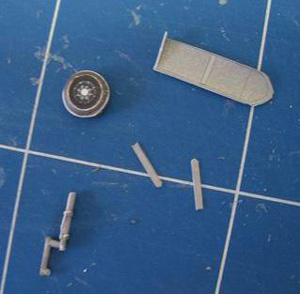
These are the parts for the front landing gear, the wheel and the door. Again, I put some wire into the landing gear for reinforcement of the part.
As I left the windows for the cockpit out when assembling part 3, I still had to find a way to mount the windows. At the end I cut the transparency into the shape of the windows and glued the pieces into the openings of the cockpit as seen on the photo below.



Finally, I used some acryl colors to color the edges e.g. of the wings, the tailfin, the wheels, and on some of the connecting points of the sections. This time I preferred acryl colors to achieve a metallic finish on the wings.
Overall the model of the X-3 was fun to build. The fitting of the pieces was very good, and where I messed around, it was properly my fault trying to build the model fast at late hours. And at the end, no matter whether or not this airplane was a success or not, the thing just looks great�


Hopefully Paper Trade will offer more interesting models in the same quality.
Summary:
| Model: | Douglas X-3 "Stiletto" |
| Kit: | Paper Trade |
| Designers: | Cor van Haasteren | Scale: | 1/50 |
| Difficulty: | Medium |
| Number of Parts: | about 140 parts |
| Instructions: | Schematic diagrams and text in Dutch and English |
| Fit: | Very good |
| Coloring and Artwork: | Very good |
| Printing: | Very good by JSC in Poland |
| Resources: | http://users.dbscorp.net/jmustain/x3.htm
http://www.ninfinger.org/~sven/models/x_planes/x3.html http://www.wpafb.af.mil/museum/modern_flight/mf58.htm |
