
First Looks For the Month of April 2003
| Leopard 2A4 | Published by GPM |
| Designer: | Grzegorz Pomorski |
| Description: | German Main Battle Tank |

Kit: A 1/16 super detailed kit which comes in a booklet on A3 paper and card stock. The kit contains 22 sheets of colored card stock, five sheets of internal parts to be glued to heavier card stock for strength. There are four pages of detailed diagrams which will be needed by non Polish speaking builders as the instructions for the model are in Polish. There are also two pages of pictures of different parts of the completed model, one in color and one in black and white. The model has a detailed interior with engine and ammunition box. There is also a snorkel provided in the kit which can be attached to the hatch on top of the tank.
Construction: Construction of the model starts with all of the components that make up the interior of the tank. Build the engine, fighting compartment and ammunition box and shells that will go into the ammunition box. Now build the interior parts of the hull that you have reinforced placing the parts that you built first inside the hull. Start on the bogies and suspension for the tank. When completed glue to the proper place on the bottom of the hull. Cut and glue the outside pieces to the hull and finish up with the detail such as hatches machine guns and mortars. Build the interior of the turret using the reinforced parts and then cover the turret with the colored card stock. Build the main gun and attach to the turret. Make the hatches for the turret and attach in the proper places along with the machine gun you previously made. After the hull and turret are completed add the detail parts to both of these to finish your model off.
First Impressions: A highly detailed well-designed model typical of GPM. Being 1/16th scale it will make up into a large model. Not a model for the beginner or for the faint hearted.
| F-16C | Published by Kartonowy Arsenal |
| Designer: | Dariusz Racyzynski |
| Description: | U.S. Air Force Fighter Bomber |
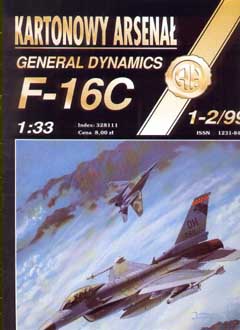
Kit: A highly detailed 1/33 kit that comes in booklet form. Halinski produces their models in a size that is slightly bigger than A4. This model contains four sheets of colored card stock, one sheet of colored regular paper to be glued to a reinforcing card stock and two pages of formers on regular paper to be reinforced. Instructions are in Polish but there are two pages of detailed diagrams which will help in the construction of the model. There is also a beautiful cut away view of the aircraft with different weapons that can be carried. The kit contains a detailed cockpit and wheel wells. The nose can be left open and there is a radar set that you can build and display in the open nose. There is no colored card stock canopy but there is a template so you can make your own transparent canopy. Missiles and bombs are provided for you to mount on your completed model.
Construction: Construction of the fuselage is very much like building a card ship model. You first build a framework consisting of horizontal and vertical formers and then glue the skin of the fuselage over the frame. Make sure that you build the cockpit before skinning the frame. Also you will need to build the forward and main wheel wells, as they are in the fuselage, before skinning the fuselage. Decide if you are going to leave the nose open, if so then build the radar and glue to the front of the fuselage. Build the wings and tail section and attach to the appropriate sections of the aircraft. You have quite a selection of bombs and missiles to choose from so decide which you would like to have on your aircraft and build those. When finished attach these missile and bombs to the correct attachment points. Build the landing gear and wheels and glue to the forward and main wheel wells. Use some type of transparent material and the template provided and make the canopy for the aircraft. Glue the canopy supports over the transparent material and then glue the canopy over the cockpit.
First Impressions: A very detailed model that uses different construction methods than we are used too. Not a model for a beginner but will make up to an impressive model when finished.
| U.S.S. San Francisco | Published by Kartonowy Arsenal |
| Designer: | Grzegorz Nowak |
| Description: | WWII United States Navy Heavy Cruiser |
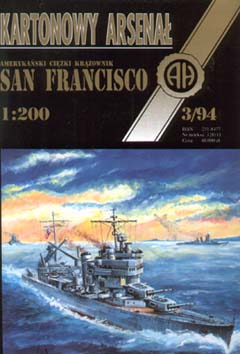
Kit: A 1/200-scale model that comes in booklet form slightly larger than A4 size. The kit contains nine pages of colored card stock, one sheet of colored parts on regular paper and four pages of formers on regular paper to be reinforced with heavier card stock. The instructions for the model are in Polish but there are two and a half pages of detailed diagrams to help the non- Polish speaker in construction of the model. The kit has the pieces to build a full hull version but you are given the option to build a waterline model. The kit contains the parts to build two float planes that can be mounted on the catapults. Gun turrets can be made to rotate and guns in them to elevate.
Construction: Construction of the model begins with the internal framework. Decide if you want to build full hull or waterline model. Cut parts out that you need for the version you decide on and glue to a heavier card stock for support. It is recommended that the base of the framework be pinned or glued to a piece of wood or plastic to insure that no warping occurs while building the frame. When the frame is finished cut the deck parts out and reinforce them, then glue the deck to the top of the frame. Cut the hull sides out and glue them between the base and deck. At this point you can remove the completed hull from the piece of wood or plastic as it should not warp beyond this point. Cut the parts out to build the superstructure and glue them together on the deck. Cut assemble and glue all of the gun turrets and guns together and then glue to the proper place on the deck. Make the funnels, catapults and aircraft and glue to the proper place on the ship.
First Impressions: A nicely done model. Colors and printing are sharp and appear in register. Not overly detailed and should be buildable by anyone with some card modeling experience.
| SM-42 | Published by GPM |
| Description: | Polish Diesel Locomotive |
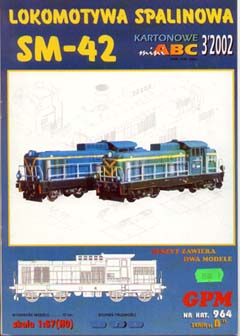
Kit: An HO (1/87) card model of two diesel engines delivered in booklet form. The models are on four sheets of card stock, also included is one sheet of diagrams. There is one page of instructions but they are in Polish so you will be dependent on the diagrams if you do not read Polish. Looking at the diagrams they appear to be very detailed so the lack of instructions should not be a great hindrance. The kit contains a complete under carriage and wheel set and interior of the locomotive. One model is overall blue and the other one is green. Printing and coloring of the kit is outstanding.
Construction: Start construction by building the frame. Then build the transmission, suspension and wheels and glue them to the bottom of the frame. Cut the parts needed to build the frame of the engine, cab and tender and glue all of these together. Now cut and fold the outside skin of the engine and cab then glue both over the frame you previously built. Build the interior of the cab including the controls and gauges. Build the car connectors and rails and attach them to the front and rear of the engine. Finish up by rolling and attaching the stack to the front of the engine.
First Impressions: A beautiful little train engine. Quite detailed but once you get past the under carriage and wheels it does not look that complicated. Will not take an expert to build but I would suggest some card modeling experience before trying this model.
| Seversky P-35 | Published by Modelik |
| Designer: | Bohdan Wasiak |
| Description: | U.S.A.A.C. 1930's Fighter |

Kit: A 1/33 scale kit that comes in a booklet. The size is A4 but the four sheets of card stock are actually one piece that has been folded into four parts and stapled into the cover. The back of the front cover does contain some instructions but they are in Polish. Both front and back sides of the back cover contains diagrams. The kit contains a detailed cockpit which can be installed or left out. Printing is done in a silver ink and is very sharp, markings appear to be correct and stand out very nicely.
Construction: Start construction with the fuselage. Fuselage is constructed using the butt and glue method. In this case each of the fuselage sections is rolled and glued and then a former is glued in each end. Once all the fuselage sections are finished than you glue them together to make the completed fuselage. The kit contains a card stock canopy and if you decided to use it then you do not have to make the cockpit. If you intend to use transparent material to make the canopy than you should construct the cockpit and glue it into section three before gluing the fuselage sections together. Cut out all the framing for the wings and assemble them. When finished cut the skin of the wing out and roll and glue it around the wing. Build the main landing gear and tail wheel and glue to the proper positions.
First Impressions: Modelik kits are of the intermediate level. You do not have to be an expert to build these models but some card modeling experience would help. If you are interested in building the Polish card models this is a good company to start with.
| Platform Ursus and TK3 | Published byGPM |
| Designer: | Eugeniusz Moczuk |
| Description: | 1920's Tankette with Transporter |

Kit: A 1/25 model that comes in a booklet of A4 size. The model is on seven pages of colored card stock. Instruction are in Polish but two pages of diagrams are provided which will be a great help for non Polish readers. Included in the kit are the Tankette, its Transporter, a Bicycle and two figures. There are two pages of colored pictures of the completed model, one that includes some of the other vechiles GPM has released. The truck is much more detailed than the Tankette, it contains the transmission and engine as well as a detailed cab. Printing and coloring of this model is of the highest quality.
Construction: This kit is actually a series of models, I will start with the Tankette itself. Reinforce the formers for the hull and turret with a heavier card stock than provided. Glue the formers together and then glue the skin of the turret and hull over the frame. Cut the parts out for the suspension and then form and glue them together. Cut the tracks out and roll them around the bogies on the suspension. Cut the parts out for the turret gun and roll and glue them together, when finished glue to the turret. Start on the truck by building the frame, engine and transmission. Glue together then build the cab and truck bed and mount on the frame. Build the bicycle and two figures that are provided in the kit and now assemble your diorama. Mount Tankette on the Truck and place the bicycle and figures alongside.
First Impressions: Another fine kit by GPM. Not overly difficult but not one that I would recommend for someone who has no card modeling experiences.
| North Leach Prison | Published by Fiddlers Green |
| Designer: | Brian White |
| Description: | 1791 House of Corrections |

Kit: A four page kit that is provided from Fiddlers Green as a PDF file. The file prints out on 8 1/2 by 11 inch card stock. You will need a color printer and a good grade of card stock to print the model out on. The kit makes up into a nice diorama with the base that is provided. Along with the base there are eight buildings and several figures provided. Not much in instructions are provided but there is an exploded diagram by each building that shows how to assemble that building. Coloring and artwork on this little model is outstanding.
Construction: Start the construction by cutting out the base which all buildings will be glued to. I would suggest that you reinforce this base with a heavier card stock for stiffness. The buildings to be mounted on the base are numbered so proceed with construction following these numbers. Build the Work Room Block following the diagram provided and glue to the rear of the base. Build the cell blocks, numbers two through five, when finished glue to the indicated positions on the base. Construct the Infirmary and Workrooms Tower, numbers six and seven, and glue to the base. Finally build the Keeper's House & Court Room, number eight, using the exploded diagram and then glue to the base.
First Impressions: A very colorful model that should be buildable by anyone with very little card modeling experience.
| Pohansko u Breclavi | Published by ERKOtyp |
| Designer: | Richard Vyskovsky |
| Description: | Roman?? Buillding |

Kit: This kit comes with instruction in two languages neither of which is English so I am doing some guessing. It appears that this is a Roman or Roman style building. It comes in a booklet form that is slightly larger than A4. It comes with two sets of instructions one in Cz and the other in German. For those that do not read either language there are two pages of exploded diagrams to help you in constructing the model. There are eight pages of beautifully colored and sharply printed pages in the booklet.
Construction: The diagrams show that construction is done in three sections, the main building and two wings. Start your constructions by building the main building. Cut the sides out and then cut the openings where the doors and window will go out from each side. Glue the windows and doors into the openings in the sides. Glue the sides together to make the building and now add the columns to the front of the building. Finish the main section off by building the roof. Both wings are built in the same manner. Cut the sides out and cut all openings in the sides out. Now cut the doors and windows and glue them into the sides. When finished glue the wings onto the main building.
First Impressions: A very nice looking model with lots of detail. Will take time and patience to build this great model.
| 1916 Mk1 British Tank | Published by Paper Models International |
| Designer: | Errol McCarthy |
| Description: | WWI British Tank |

Kit: These 1/35 kits were designed by Mr. McCarthy in 1982 and have finally been released by Paper Models International this year. The kit contains 10 sheets of parts on a gray paper. Along with each sheet is another sheet with the rivet patterns on them. A piece of screen is provide along with a set of decals for the model. There are four sheets of instructions/diagrams all in English. The first page of instructions contains pictures of the tools that will be needed to build the tank. The second sheet is a set of general assembly instructions for paper models by Mr. McCarthy. The final two pages contain the instructions and diagrams necessary to build the tank.
Construction: Each part sheet consists of the part sheet and a rivet sheet. Before cutting the parts out lay the rivet sheet over the back of the part sheet insuring the rivets and parts match up. Put the two pieces of card stock on a piece of heavy cardboard and using a fine tip ball point pen push down on each rivet mark. This will now leave the rivet marks on the parts sheet and you can cut them out. Start construction by cutting out and gluing the two sponsons together. Cut the tracks out and score them on both sides. Now wrap the tracks around the sponsons. Cut the parts out to build the hull and glue them together. When finished glue the two sponsons with tracks to each side of the hull. Build the cannon sponsons being sure not to glue the guns. Follow the directions which show using a toothpick to allow the guns to rotate. Glue the gun sponsons on each side of the tank. Build the steering tail assembly, hydraulic ram assembly and the anti-grenade net, this is where you use the screen, and glue to the proper position on the tank.
First Impressions: Very interesting design. Does not look too difficult to build but I do not like the dark gray paper the model is printed on. It makes it hard to see the lines you have to cut on.
| Edmund Fitzgerald | Published by JSC |
| Description: | Great Lakes Ore Carrier |

Kit: This 1/400 scale kit comes in an A4 booklet that contains four pages of colored card stock. The booklet has two pages of instructions in Polish and one page of diagrams. The model that was sent for review came from Paper Models International and has a full sheet of instructions in English. If you buy the model from any other place this may not be true. Colors and printing on this model are outstanding. The decks of the ship are orange with hull sides being done in brown and cream. All hull sides are printed on both sides so that the inboard parts that are above the deck have the proper colors.
Construction: Building the hull of a JSC model is backwards from the way most other companies build their hulls. In this case you start from the deck and work down, on other ships you start from a base former and work up. Start by cutting all the deck parts out. Bend the sides of the main deck section down and into a triangle that is underneath the deck. Glue the deck sections together and then glue the formers underneath the deck following the marks on the top of the deck. I would recommend gluing the deck parts and formers to a heavy card stock for reinforcement. Once you have the deck and formers in place cut the hull sides out and glue to the tabs on the sides of the deck. Build the fore and aft superstructures and glue to the appropriate parts of the deck. Glue hatches onto the deck and them build all the accessories and attach to the deck.
First Impressions: A very nicely done model of a famous ship. Does not appear to be too difficult to build but JSC's building methods take a while to get used to. If you have not built a JSC model take your time as it can be confusing to someone who has built other companies ship models.
| Dornier 335A "Arrow" | Published by Fiddlers Green |
| Designer: | Kancho Iliev |
| Description: | WWII German Fighter |

Kit: This kit is available directly from Fiddlers Green as a downloadable PDF file. There are two sizes of the model available, a small which is in the normal FG size and a large size. You will need a color printer and good quality card stock in order to print the model out. Fiddlers models are not in any particular scale, they are printed to fill an 8 1/2 by 11 inch sheet of card stock. They do use a base scale of 1/60 and all models have a percentage that relates their size to that scale. This model is rated at 140% which means its size must be increased by 1.4 to be 1/60 scale. The model prints out on two sheets of card stock, one which contains the instructions for building the model. This model does contain the parts to build a cockpit which is unusual for FG's aircraft models.
Construction: Fuselages of Fiddlers models do not contain internal formers. You cut and roll the fuselage section out and then glue them together using the tabs on the end. If you intend to detail the cockpit, form the pieces and glue them into the proper fuselage section. A colored card stock canopy is provided but if you wish to display your cockpit you will have to scratch build a transparent canopy. Cut and fold the wing center section and insert it into the marked fuselage section. Cut fold and glue the wing outer sections and glue onto the wing center section. Cut and form the tail section out and glue to the rear of the fuselage. Build the landing gear and wheels and glue to the under sides of the model. Build the two propellers and glue one to each end of the aircraft. Finish your model by building the spinners and air scoops and glue to the model.
First Impressions: Standard Fiddlers Green model. Easy to build and looks very nice when finished. The addition of the cockpit will be welcomed by those who like to detail these little beauties.
| 1:32 Mercedes-Benz Actros 2535 Truck | Published by PK Graphica |
| Designer: | Petr Knotek and Jozef Dojcar |
| Description: | MB Actros Truck with Panav Canvas-side Cargo Body and Trailer |
| Reviewer: | Neil Linnell |
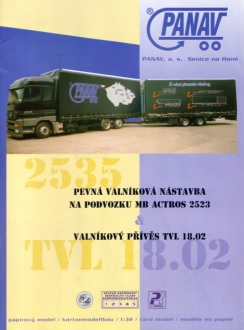
Kit: This model is yet more proof that PK Graphica is currently producing the very best card models of modern civilian trucks. The design work is excellent, and the printing is crisp clear. The sleek lines and contours of the aerodynamic cab are faithfully reproduced, with seams positioned in just the right places. Even though the scale is "only" 1/32 (a standard scale for Czech-designed truck models), this truck and trailer combination will be an impressive 2 feet long when complete. As is the case with many truck models of this scale, there is no cab interior, but this should not be considered a detraction as the printed cab windows are very convincing. The model comes printed on 12 pages of cardstock in booklet form; a nice feature is that parts numbers are color coded-- yellow for the truck and blue for the trailer. There are also several very good construction diagrams. Instructions are in Czech, but do provide an idea of construction order (which is not strictly according to part number).
Construction: Construction follows a typical pattern for this type of model. First, the vehicle frame is built, complete with suspension and other details such as drive train components, fuel tanks, and various other appendages. Wheels are made up; in this case the wheels are pretty detailed with accurately depicted hubs. The cab and cargo body are assembled, and the model is completed with the small details such as mirrors, etc.
First Impressions: This looks like a really great model and
has the potential to be a real show-stopper on your shelf. At 450+ parts, it's
not really a beginner's model, but an experienced modeler should enjoy this
model very much.
| F-117A Night Hawk | Published by Fly Model |
| Description: | U.S.A.F. Stealth Fighter |

Kit: This 1/33 scale model comes in a A3 size booklet. The booklet contains five sheets of card stock, two sheets of formers on regular paper, two pages of diagrams, a three view and one page of instructions and history in Polish. The diagrams are very detailed so those who do not read Polish should have no problems in building this model. The model contains a detailed cockpit, wheel wells and missile/bomb bays. A piece of transparent material is provided to build the canopy. Two laser guided bombs are provided to be put in the bays if you want to leave them in the open position. Model is black on the top with the American Flag on the bottom of the model. An interesting marking is the skunk on the tail which is the trade mark of Lockheeds "Skunk Works" where the aircraft was designed.
Construction: Construction of the fuselage resembles the construction of a card model ship. A frame is constructed with horizontal and vertical frames and then the skin of the aircraft is glued over this frame. Reinforce the frames with a heavy card stock for strength. Build the seat and cockpit and install in the correct position before skinning the aircraft. Do the same for the wheel wells and missile/bomb bays. When the fuselage is finished, cut out and reinforce the formers for the tail section and wings. Apply the skin over both of these and glue to the proper position on the model. Decide if you want to leave the bays open and if you do build the two laser bombs and mount them in the bay. Construct the landing gear and wheels and glue into the wheel wells. Cut out the landing gear doors and glue to the sides of the wheel wells.
First Impressions: Does not appear to be too difficult of a model to build. The painting and markings on this model make it very impressive. Will be an excellent addition to your collection.
| Zinn | Published by GPM |
| Description: | Polish Tower |

Kit: This 1/100 tower comes in a booklet form A4 size. The booklet contains two sheets of card stock and one page of instructions and diagrams. The instructions are in Polish but the diagram is very self explanatory. As with all of the GPM models the printing and coloring on this kit are outstanding. The detailing is down to each brick in the tower. A clock is provided to go on the face of the tower. A very nice base is in the kit colored to represent the grass around the base of the tower. Total number of parts for the kit is 15 pieces.
Construction: Cut out and reinforce the three supports for the tower. The first support glues to the base and then to the bottom of the tower. Glue the second support about one half way up the tower where it turns from a square to an eight sided tower. The third and final support is glued to the top of the eight side pieces and then glue the roof onto the final support. Once the tower is built, build and glue the entrances to it. Glue the clock on each side of the tower and the four connectors that connect from the four sided to eight sided parts of the tower.
First Impressions: A nice looking tower that takes no previous card modeling experience to build. A great project for any ages and would work great in a school setting.
This column does not cover all the new card model aircraft and ships that have been released this month. It contains only those models that have been sent to me by dealers and designers for review or that I have purchased for review. Due to space restrictions, some models sent in for review may be held over until next month.
Thanks to the following for providing kits for inspection and review:
