
First Looks For the Month of: November
| Leopold | Published by GPM |
| Review by: | Jim Nunn |
| Description: | German WWII Rail Gun |

Kit:This 1/25 scale model comes in booklet form. The model is printed on 39 pages of A3 (2 x A4) high quality paper. There are 30 pages of parts and 2 pages of color photos of the finished model. Instructions are in polish, English and German with 5 pages of assembly drawings. The instructions are good and the assembly diagrams are excellent. I stopped counting parts at 2700.
The model represents the K5 Leopold rail gun that is on display at the Aberdeen proving grounds in Maryland USA. Leopold is one of the two rail guns that were collectively known as Anzio Annie that made life miserable for the allied troops and ships at the Anzio landings. The bore of the gun is 11 inches and it was capable of accurately throwing a shell 11 miles.
This model is huge the over all length is 50.4 inches (128 cm) the model also includes a set of rails and a model of the typical rail bunkers found in France. The model has a working elevating mechanism and recoil system both are complex and would be a fun challenge to build. The model is highly detailed with several working assemblies. To give you an idea of the level of the detail most of the large bolt heads are individual parts rather then printed detail. GPM rates the model at level 3 for difficulty however the parts are relatively large and with the excellent building diagrams I think any experienced paper model builder would no problems building the model.
The color scheme is a mottled brown over tan. From what I have read and photos that can be found on the net this color scheme may not be what these rail guns were painted however it certainly looks great and with the models size it would be the center attraction to your card model collection. With the excellent printing quality and the attention given to the fine detail the new GPM models are certainly rank among the best available and this model ranks among the best that GPM has produced. If nothing else the model makes a nice coffee table book.
| Lockheed P-38J Lightning | Published by DeWayne Barnett |
| Designer: | Marek Pacynski |
| Description: | WWII U.S. Long Range Fighter |

Kit: This 1/50th kit comes on a CD with several other models. The models are in PDF format on the CD and you will need a color ink jet printer along with suitable card stock to print the model on. This model prints out on five sheets of card stock, the first contains the description and diagrams. three sheets contain all the exterior parts to build the aircraft. One sheet contains the formers and diagrams for the fuselage and booms. There is also a cover sheet with the specifications of the aircraft along with two diagrams showing where the parts should go. No instructions are provided but the diagrams are very self explanatory and will be all you need to build this model. Parts are not provided to build the cockpit or wheel wells and the canopy is in colored card stock. Landing gear is provided and glued directly to the bottoms of the fuselage and booms.
Construction: Before starting construction reinforce all parts marked in red with .5 to .8 mm cardboard. Construction is a little different from most models as this aircraft has a fuselage and two booms with an engine and tail at the ends of the booms. The fuselage and booms are built using the "butt" method, each fuselage and boom section is built with a former in each end and when all sections are finished they are "butt" glued together. Cut the main wing former and insert through the fuselage. Then glue the rest of the formers to the main wing spar. Cut and form the skin and glue it around the formers. The booms are now glued around the wing. Cut, form and glue the wing fillets to the top and bottom of the wings. Build the air scoops and glue them to the sides of the booms. Now build and glue the turbo chargers to the top of each boom. Build and glue the tail section to the rear of the fuselage and them the landing gear to the bottom on the fuselage. You may want to use wire or a toothpick in the landing gear struts to give them strength also.
First Impressions: Not a model for the beginner. The P-38 is a complex model and you should have experience building card models before attempting to build any model of this aircraft. Once you complete it though, you will have a very impressive model.
| Operation Husky | Published by JSC |
| Designer: | Marek Twardowski and Slawomir Czolczynski |
| Description: | Diorama of the Invasion of Sicily |
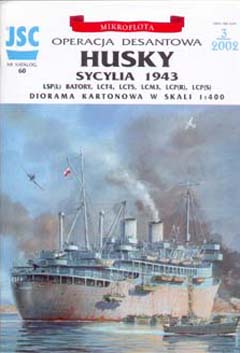
Kit: This diorama comes in an A4 booklet form containing 11 colored pages. The thickness of the card stock varies to the size of the different models. There are four pages of detailed diagrams and two pages of history and instructions in Polish. The model I received came from H&B; Precision Modes and contained the four pages translated into English. Included is also a fold out sea scape to display the diorama on. The booklet contains models of the Batory, a troop transport. The following landing craft; 1 ea. LCT4, 1 ea. LCT5, 1 ea. 1 ea. LCM3, 12 ea. LCP(R) and 10 ea. LCP(S). The following vehicles are provided; 5 ea. DUKWS, 4 ea. Stuart II, 13 ea. Sherman and 6 ea. Half Tracks. Also include on the back cover are two Hurricane Mk IID and one Airspeed Horsa glider. All the models are in 1/400 scale so you can put the vehicles on the ships provided.
Construction: With all the models in the diorama, where you start will depend on what you want to build first. I would personally start with the transport ship then do the landing craft and finish up with the vehicles. The aircraft are very small so you will have to determine if you have the motor skills to build them. JSC uses a different method of building ships than most other companies. You first build a frame which consists of the deck frame and side frames, then you glue the internal formers inside this frame. When finished you glue the deck and sides to the frame. Then you build the super structure up on the deck. After you build the transport build the landing craft and decide if you want them mounted on the ship or on the diorama sea scape that JSC provides. Building the vehicles is fairly easy, cut score and fold, cut and roll the turrets and glue the turrets to the base. You can then put the vehicles in the landing craft or on the transport.

First Impressions: Does not appear too difficult of a project. It will take some time because of all the parts to the diorama. It also will require some motor co-ordination to cut and fold the small parts on the landing craft and vehicles.
| Mukilteo Lighthouse | Published by Paper Models International |
| Designer: | Chip Fyn |
| Description: | Lighthouse located at Mukilteo Washington |

Kit: One of a series of lighthouse located along the Washington coast designed by Fiddlers Green and published by Paper Models International. The model comes with two sheets of card stock, a page of general instructions for building lighthouses and a sheet of transparent material. The transparent material has the markings for the railing and lamp room printed on it. The railings and windows are also printed on card stock so you have your choice of which you want to use. Colors are grey with red roof and chimney.
Construction: It is recommended that you glue the model to a stiff piece of cardboard. Start by cutting the two building pieces out and gluing them together. Then cut and glue the tower section and glue that to the main building part. Now cut and fold the building roof out and glue it to the top of the building. Add the roof edges and chimney to the roof. Now build the light tower, starting with the collar then the middle section then the light room and roof. Add the corbels to the middle section and the railings on the top of this section. Finish your model by constructing the dormer and gluing to the main building roof.
First Impressions: A beautiful little model which should be buildable by anyone. A great gift to someone to get them interested in card modeling.
| Republic P-47D Thunderbolt | Published by JSC |
| Designer: | Jacek Slowik, Miroslaw Czolczynski |
| Description: | WWII U.S. Army Air Corp Fighter |

Kit: This 1/24 scale model is presented in booklet form that contains 13 pages of card stock. It also contains four pages of history and instructions in Polish. The model I received was from H&B; Precision Models and contained two pages of instructions in English. If you buy the model elsewhere this might not be the case but the model does come with a page of detailed diagrams which will be a big help for non Polish speakers. Two of the pages have printing on both sides which show the colors inside the cowling. A very detailed model that contains a full cockpit and wheel wells. Parts are provided to construct a detailed engine. There is no colored card stock canopy, templates are provided for you to make the transparent parts for the canopy. The model is green over silver on the top and gray bottom. The red tail and front of the cowling are particularly striking.
Construction: The fuselage is built using the "connecting strip" method. In this method a connecting strip is glued in one end and then a frame is glued in the fuselage section. When the sections are finished then you glue the the sections together using the connecting strips. When building the fuselage make sure that you build the cockpit and put it in section two before gluing to the next section. Also you will have to build the engine and glue to the fuselage before attaching the cowling to the fuselage. Cut and glue the tail formers to the rear of the fuselage and then glue the horizontal and vertical stabilizers to the frame. Build the wing frames and glue to the sides of the fuselage. Now build the wing wheel wells inside the wing skin and then glue the skin over the frames. Build the landing gear, propeller and canopy and glue to the appropriate position on the aircraft.
First Impressions: Another great addition to JSC's 1/24 scale. Not a model for a beginner. Will make an impressive model when finished but you need some card modeling experience before attempting this model.
| Clermont | Published by Micromodel II |
| Designer: | Matthew Sparks |
| Description: | Robert Fulton's Steamboat |

Kit: These little models, 5" by 3.5" were initially introduced in Great Britain during the 1940's. Over 100 of these little models were released from 1940 to 1960. This model was one that was listed in there catalog but never released. The model comes a package with the instructions and history on the cover. The model itself is on three of the 5" by 3.5" sheets of card stock and one sheet of diagrams. Model is surprisingly detailed for such a small offering. The Watts steam engine is a model in itself. Model comes with a little stand for you to display it on.
Construction: Start by cutting out the base and gluing it together. Now cut and fold the hull and then glue it to the base. Cut and fold the deck and glue to the hull, then build the deck houses and the engine room and glue to the deck. Build the paddles and glue to each side of the ship. Use match sticks to make the masts, then cut the sail from the card and glue to the mast.
First Impressions: Does not appear to be too difficult of a model to build but will take some motor skills because of the small parts.
| M997 Hummer-Ambulance | Published by Modelik |
| Designer: | Adam Kolczarek |
| Description: | U.S. Army Hummer Ambulance |
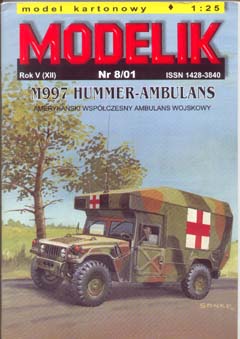
Kit: This 1/25th kit comes in booklet form with 10 sheets of card stock and six sheets of parts and formers on regular paper. There does not appear to be any instructions only about half a page of history and basic card modeling tips all in Polish. There are four pages of detailed diagrams which I assume that you would use to actually build the model. This is a very detailed model, you build the chassis engine and transmission and then the body on top of this. This will be a real project but a very impressive model when finished. Interior of the model is in gray and the out side is in standard U.S. Army camoflauge.
Construction: Construction of the model begins with the chassis. This is very detailed with all the springs, transmission and engine to be built and assembled. Once the chassis is assembled you will build the bottom of the body and glue it to the chassis. Now build the cab with all the controls, build the doors which can be left opened or closed or actually built so that they can open and close. Build the hood and attach to the front of the vehicle, this also can be left open or closed or built so that you can open it and look at the engine and transmission of the vehicle. Build the ambulance section which will attach to the bottom of the body behind the cab. Interior of the ambulance has the stretchers and other equipment inside. The rear doors can be built so that they open and close so that you can display the interior of the ambulance. Finish up your model by making the wheels, rear view mirrors and antennas.
First Impressions: A very impressive looking model. The amount of detailing on it is awesome. Not a model for a beginner but one you will be very proud to display once it is finished.
| John D. Ford (DD 228) | Published by Kartonowa Flota |
| Designer: | Stanislaw Burnat |
| Description: | U.S. Navy Four Stack Destroyer |

Kit: The first of a new line of ships that has just become available to me. These ships are part of Kartonowej Encyklopedii Lotnictwa (KEL) the company that distributes Marek Pacyinski's aircraft models in Europe. In there 1/50 aircraft models they have aimed at producing models that are relatively inexpensive and easily built but well engineered and realistic. It appears that they are taking the same approach with this line of ships. I have received the first five of the models and will be reviewing them over the next few months.
The first model I will review is the John D. Ford, a four stack Destroyer. The model comes on three sheets of A4 (8.5 x 11.5 inch) card stock. The first sheet contains detailed diagrams of where all the parts go on the ship and a history of the ship. Everything is in Polish so you will be dependent on the diagrams when building the ship. The other two sheets contain all the parts you need to build the ship. Several things have been done to make assembly easier, parts that are to be reinforced with heavier card stock are marked with a red dot. Part numbers are outlined in blue so that you do not get confused with numbers on the parts where other parts are glued. The hull of the ship is in gray and the decks are blue.
Construction: Construction of the model is of standard ship methods that you see in almost all card ships. The hull is the "egg crate" method, cut the base and hull formers out and reinforce them. Glue the vertical frames on the base and then the horizontal frames to the vertical frames and base. Now cut the deck sections out and reinforce them, then glue the deck to the top of the hull frames. During the above make sure that everything stays straight, you can do this by gluing the base to a piece of wood or pining it to the wood or any other solid material. This is the key to building ship models, if you don't do this than the hull will warp and the model ruined. Now cut out the sides of the hull and glue then between the base and deck. Once the hull is finished now build the super structure, guns, torpedo tubes, depth charges and life boats. Glue all of these to the proper place on the ship.
First Impressions: This looks like the answer to those that want to build ships but do not have the time to build the more complex models. I have not built any yet but they look like they will make a very respectable model.
| Roman Town House | Published by Card Models.CO.UK |
| Description: | Roman Town House built in Britian |

Kit: Another new company that found us this month. They have sent us four models out of a series called "Britain through the ages series". The models come in a shrink wrapped package with two sheets of card stock and an instruction/history sheet on regular paper printed on both sides. The model consists of five pieces and seven figures. Historical information and links to web sites with further information are provided.
Construction: Construction is very simple on these models. Cut out the five parts then score and bend the tabs. Using the diagram on the instruction sheet glue the five pieces together. Cut, score, fold and glue the seven figures provided and set them around the building.
First Impressions: A very simple model that is suitable for children or someone trying there hand for the first time on card models.
| B-47E Stratojet | Published by Wilhelmshavener |
| Designer: | E. Brueckner |
| Description: | U.S. Air Force Cold War Era Medium Bomber |

Kit: This 1/50 scale model was originally designed and published in 1957 and was then re-issued in 1998. Having been designed four decades ago does not distract from the quality and attraction of this model. The model comes on eight sheets of A3 paper which breaks down to 16 sheets of A4 paper that we in the U.S. are more used to seeing. This model does need to come on this large size paper because of its size. Even at 1/50 this a large model Each wing takes up one full A3 sheet and it has to be on an angle to fit. Wilhelmshavner models are not overly detailed but do make up into very realistic and accurate models. The model does not contain a cockpit and the canopy provided is of colored card stock. Detailed landing gear is provided but there are no wheel wells. The model is in silver paint with standard cold war markings on it. Engine nacelles are very detailed with intakes and exhaust being built.
Construction: Construction of the fuselage and engine nacelles are of the former connecting strip method. On each of these you cut and roll the fuselage section out, cut the former out and reinforce it with thicker card stock and cut a connecting strip out. Roll and glue the fuselage/engine section together and then glue the connecting strip around the indicated side. Insert and glue the former into the same end as the connecting strip. When all section are finished glue them together along the connecting strip. Start buy building the fuselage than go to the wings, Wilhelshavener provides very strong wing frames which help to prevent warping. Build the frames and glue them to the fuselage, then cut and fold the wings and glue over the frame. Build the engine nacelles as indicated above and glue them under the wings. Build the tail section and the rear gun and glue to the rear of the fuselage. Cut and glue the canopy to top front of the fuselage. Build the landing gear and wheels, glue them together and then glue them to the bottom of the fuselage.
First Impressions: A great addition to a 1/48/1/50 scale collection. Standard Wilhelshavener building techniques, not overly difficult but you should have some card modeling experience before attempting this model.
| Destroyer J-K-N Class | Published by CFM |
| Description: | British WWII J-K-N class Destroyer |

Kit: This 1/250 scale ship comes in a booklet that contains five sheets of card stock. Size of the stock is bigger than A4 but smaller than A3, it measures 9 1/2" by 12 3/4". Four are colored and one is black and white with frames that should be glued to heaver card stock. Two pages of history with instructions and two more with black and white pictures. Our friend Thomas Pleiner has translated the history/instructions sheets to from German to English for those of us who do not speak German. There are four sheets of very detailed diagrams which will be invaluable in building the ship. You have the choice of building the model as either a full hull or a waterline model. A very detailed model with options for many moving parts. Color of the ship is gray with blue decks and red below the waterline.
Construction: Before starting decide if you want your model to be full hull or water line. This will determine how much of the vertical and horizontal formers you use. Cut the base and the portions of the formers that you need to build the version you decide on. Glue the base and formers to a heavier card stock for reinforcement. Get a piece of wood and either glue or pin the base to the wood. This will keep the hull straight and prevent warping. Glue the vertical and horizontal formers to the base place. Cut the deck deck sections out and glue them to heavier card stock. Now glue the reinforced deck sections to the top of the formers. Cut the sections of the hull sides that you intend to use and glue between the base and the deck. Once dry you can remove the hull from the piece of wood and it should be straight with no warps. Build the super structure on the deck. Build the armament, guns, torpedo tubes and depth charge racks and glue to the deck or super structure. Finish your model by building the funnel, life rafts and other details for the deck and super structure.
First Impressions: Excellent model, very detailed and the colors and markings are very clear and sharp. The ship looks like it is not that difficult to build but I would not recommend it to a beginner because of the amount of detailing that needs to be done.
| Lagg 3 | Published by DeWayne Barnett |
| Designer: | Marek Pacynski |
| Description: | WWII Soviet Fighter |
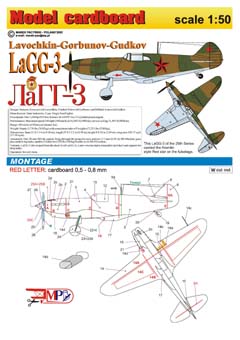
Kit: This 1/50th kit comes on a CD with several other models. The models are in PDF format on the CD and you will need a color ink jet printer along with suitable card stock to print the model on. This model prints out on three sheets of card stock, the first contains the description and diagrams. One sheet contain all the exterior parts to build the aircraft. One half of a sheet has the formers needed for the model and the rest of this sheet has a history of the aircraft. No instructions are provided but the diagrams are very self explanatory and will be all you need to build this model. Parts are not provided to build the cockpit or wheel wells and the canopy is in colored card stock. Landing gear is provided and glued directly to the bottoms of the fuselage and booms.
Construction: Before starting construction reinforce all parts marked in red with .5 to .8 mm cardboard. The fuselage is built using the "butt" method, each fuselage section is built with a former in each end and when all sections are finished they are "butt" glued together. Cut the main wing former and insert through the fuselage. Then glue the rest of the formers to the main wing spar. Cut and form the skin and glue it around the formers. Cut, form and glue the wing fillets to the top and bottom of the wings. Build the air scoop and glue it to the bottom of the fuselage. Build and glue the tail section to the rear of the fuselage and them the landing gear to the bottom on the fuselage. You may want to use wire or a toothpick in the landing gear struts to give them strength also.
First Impressions: A good model to start building Marek's models with. You will not need much experience to build the model, in fact if you take your time it could be built as your first card model.
| Albakora | Published by Kartonowa Flota |
| Designer: | Marek Borawski |
| Description: | Polish Fishing & Factory Ship |

Kit: Here is the second model I received from Kartonwa Flota. The model comes on four sheets of A4 (8.5 x 11.5 inch) card stock. The cover sheet contains formers, ship parts and a history of the ship. The second sheet contains all the rest of the parts to build the ship. The other two sheets contain detailed diagrams of where all the parts go and description of them. Everything is in Polish so you will be dependent on the diagrams when building the ship. Several things have been done to make assembly easier, parts that are to be reinforced with heavier card stock are marked with a red dot. Part numbers are outlined in blue so that you do not get confused with numbers on the parts where other parts are glued. The hull of the ship is cream and the decks are part blue and part brown.
Construction: Construction of the model is of standard ship methods that you see in almost all card ships. The hull is the "egg crate" method, cut the base and hull formers out and reinforce them. Glue the vertical frames on the base and then the horizontal frames to the vertical frames and base. Now cut the deck sections out and reinforce them, then glue the deck to the top of the hull frames. During the above make sure that everything stays straight, you can do this by gluing the base to a piece of wood or pining it to the wood or any other solid material. This is the key to building ship models, if you don't do this than the hull will warp and the model ruined. Now cut out the sides of the hull and glue then between the base and deck. Once the hull is finished now build the super structure, life boats and the other details for the deck and super structure. Glue all of these to the proper place on the ship.
First Impressions: The model looks very nice, not overly complicated but appears to be quite detailed. Good model to start with.
| Georgian Town House | Published by Card Models.CO.UK |
| Description: | Georgian Town House built in Britian |

Kit: Another of the series called "Britain through the ages series" described above. The models come in a shrink wrapped package with two sheets of card stock and an instruction/history sheet on regular paper printed on both sides. The model consists of 20 pieces and three figures. Historical information and links to web sites with further information are provided.
Construction: Construction is very simple on these models. Cut out the the two main parts of the building out and glue them together. Corrugate the roof and glue to the top of the main parts. Form the chimneys and glue to the roof, now roll the chimney pots and glue to the top of the chimney. Cut, score and fold the front and rear steps. Cut and fold the front and rear door assemblies and glue these to the front and back of the building. Finish by gluing the steps to the doors.
First Impressions: A very simple model that is suitable for children or someone trying there hand for the first time on card models.
| Junkers Ju 87B (R-1) "Stuka" | Published by DeWayne Barnett |
| Designer: | Marek Pacynski |
| Description: | German WWII Dive Bomber |

Kit: The second of the 1/33 scale models from Marek. This model is available only in PDF format on CD. You will need Adobe reader and a color printer to print the model out on. There are 11 pages on the CD, a cover sheet, seven sheets to be printed on card stock, a history page and two pages of diagrams. A detailed cockpit is provided but if you do not want to go into that much detail, a colored card stock canopy is provided. Color scheme is very accurate, the aircraft being two tone splinter green on top and blue on the bottom. One large bomb is provided to be placed under the fuselage along with the swivel that swings it clear of the propeller.
Construction: Start construction with the Fuselage. This model differs from Mareks 1/50 scale in using the connecting strip method rather than the butt glue method he used in the smaller models. Install the cockpit in the correct section before gluing the sections together. If you do not want to make a transparent canopy then just use the colored canopy provided. No pattern is provided for the transparent parts of the canopy but you can easily make the canopy by tapping the colored canopy provided to a piece of transparency and cut to fit. Then cut the blue parts of the canopy out and glue the transparent material to the frame that is left. Cut and glue the wing frames together and then cut and glue the wings over the frame. The wings are in two pieces in order to make the inverted gull wing. Start from the section closest to the fuselage and work out. The main landing gear is fixed on this aircraft with "pants" covering the wheel. Build the main landing gear, wheels and pants. Assemble the three parts and glue them to the bottom of the wings. Build the tail section and propeller and you are finished.
First Impressions: An outstanding example of this very important aircraft of WWII. Not recommend for the beginner, you should have experience in building card models before attempting this model.
This column does not cover all the new card model aircraft and ships that have been released this month. It contains only those models that have been sent to me by dealers and designers for review or that I have been purchased for review. Due to space restrictions, some models sent in for review may be held over until next month.
Thanks to the following for providing kits for inspection and review:
